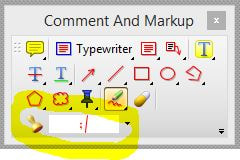
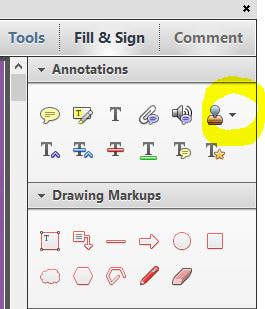
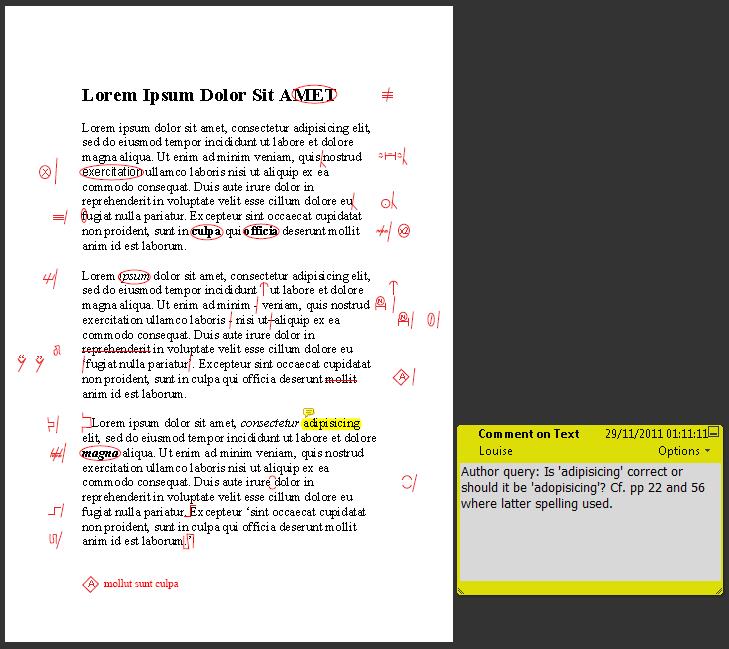
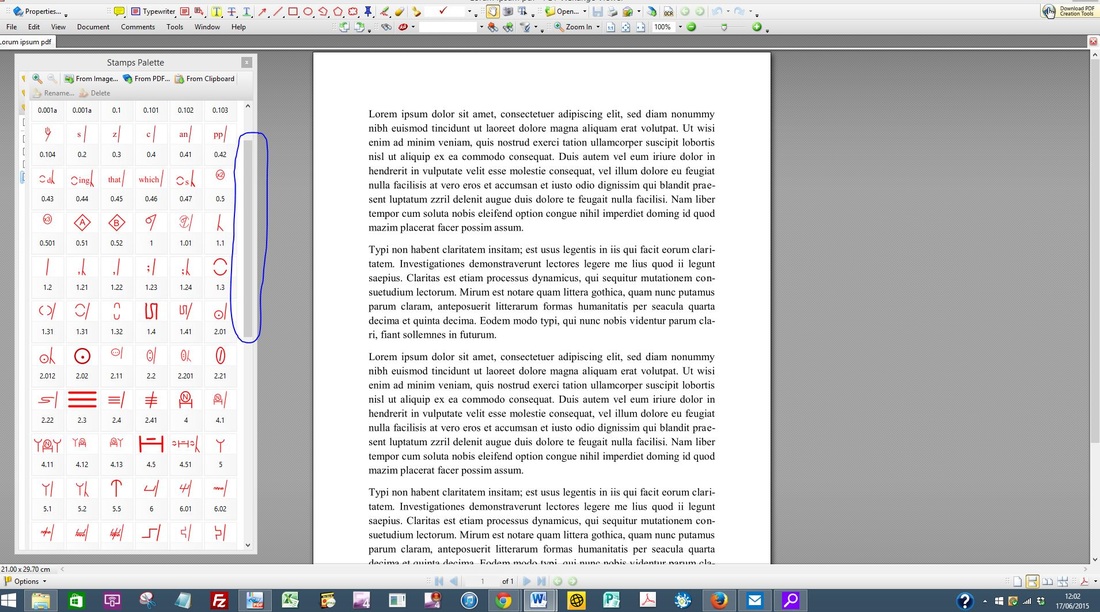
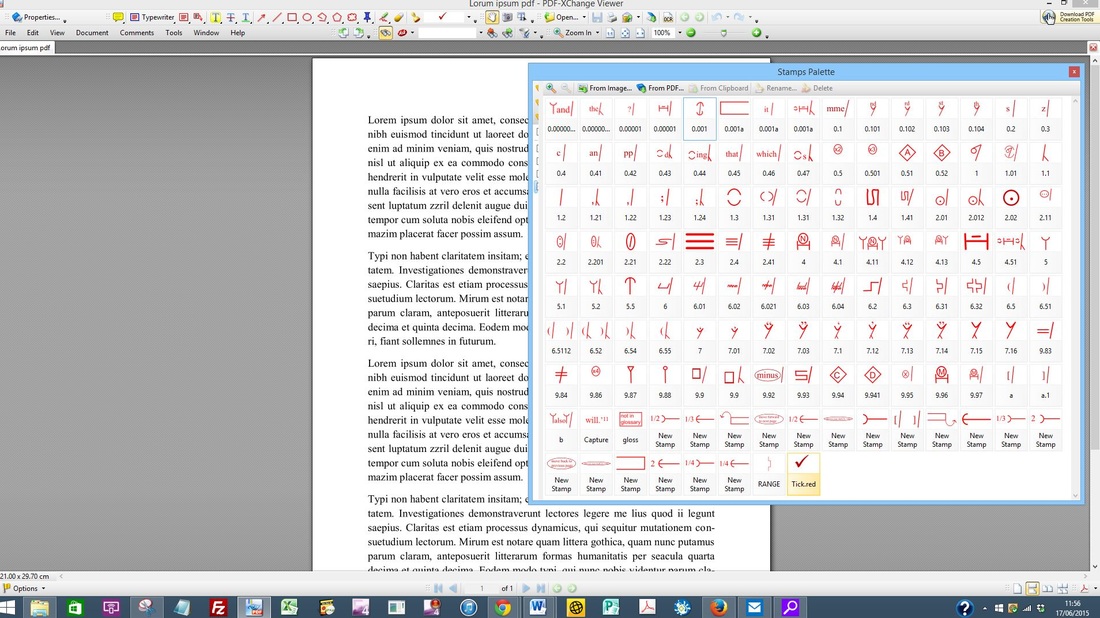
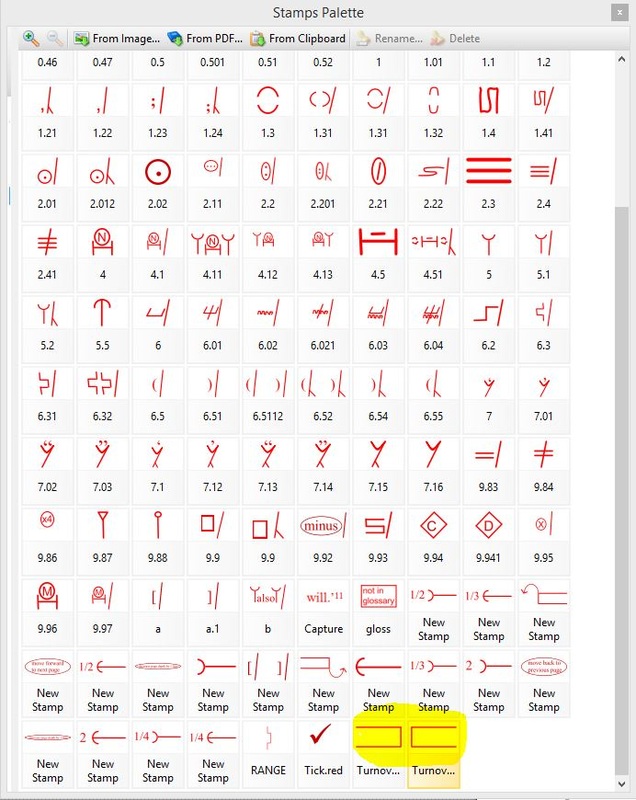
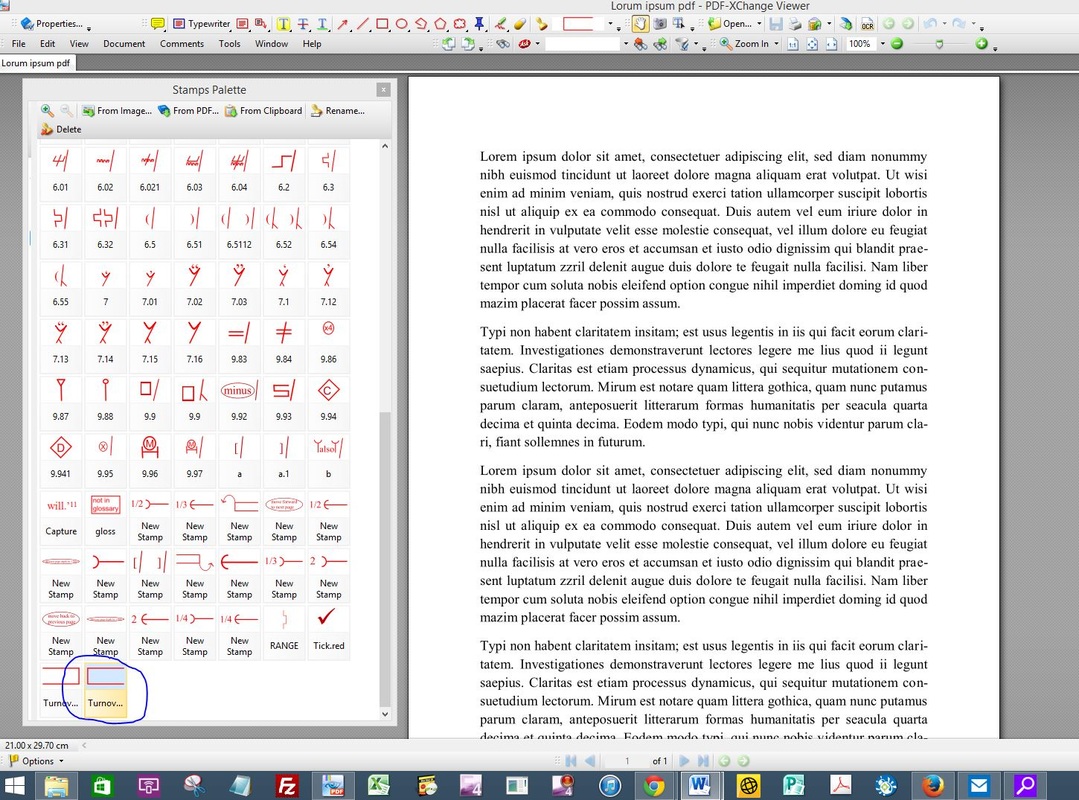
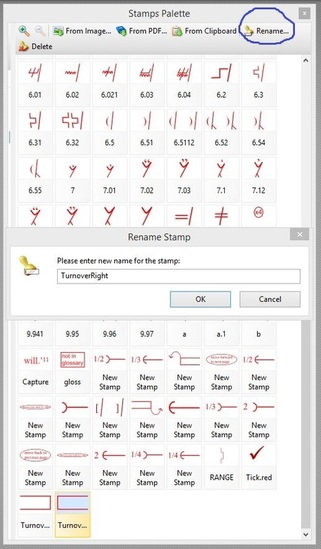
Louise Harnby | Fiction Editor & Proofreader
  • Home
  • Resource library
  • Services
  • Courses
  • Books
  • Podcast
  • Blog
  • Training login
  • Contact
The Editing Blog: for Editors, Proofreaders and Writers

FOR EDITORS, PROOFREADERS AND WRITERS

5 tips for proofreading PDFs in Adobe Reader DC

22/6/2022

0 Comments

 
Asian woman standing in front of desk and typing into computer
Picture


​Summary of Episode 93

Discover 5 PDF proofreading tips you can apply when working with Adobe Reader DC. Listen to find out more about:
​
  • Rotating the page view
  • Using the ‘Show Cover View in Two Page View’ function
  • Attaching a Word file for large amounts of corrected text
  • Why you should avoid using ‘floating’ sticky notes
  • How to find invisible errors you know you’ve corrected
  • Free versus paid-for software: Is Adobe Reader DC good enough for PDF proofreading?


​Join our Patreon community

If you'd like to support The Editing Podcast, thank you! That means the world to us.
SUPPORT THE EDITING PODCAST


Music credit

​‘Vivacity’ Kevin MacLeod (incompetech.com). Licensed under Creative Commons: By Attribution 3.0 License. http://creativecommons.org/licenses/by/3.0/.
Louise Harnby is a line editor, copyeditor and proofreader who specializes in working with crime, mystery, suspense and thriller writers.

She is an Advanced Professional Member of the Chartered Institute of Editing and Proofreading (CIEP), a member of ACES, a Partner Member of The Alliance of Independent Authors (ALLi), and co-hosts The Editing Podcast.

  • Get in touch: Louise Harnby | Fiction Editor & Proofreader
  • Connect: Twitter at @LouiseHarnby, Facebook and LinkedIn
  • Learn: Books and courses
  • Discover: Resources for authors and editors
0 Comments

Proofreading designed page proofs: knock-on effects

10/9/2018

0 Comments

 
Good proofreading practice means acknowledging that changing one word, or moving one line, can have unintended and damaging consequences throughout the rest of the book if we aren’t careful.
Proofreading, page proofs, and knock-on effects
Picture
If we want to proofread for publishers, packagers and project-management agencies, or if we're checking self-publishers' print-on-demand books, we need to be comfortable with working on page proofs. 

What are page proofs?
The proofreader will usually be asked to work on page proofs. What are they?
​'Page proofs are so-called because they are laid out as exactly as they will appear in the final printed book. If all has gone well, what the proofreader is looking at will be almost what the reader sees if they were to walk into a bookshop, pull this title off the shelf and browse through the pages.

The layout process has been taken care of by a professional typesetter who designs the text in a way that is pleasing to the eye and in accordance with a publisher’s brief.' (
Not all proofreading is the same: Part I – Working with page proofs)

​In this case, the proofreader does not amend the text directly. They annotate the page proofs.

You might be required to work on both hard-copy page and PDF page proofs – it will depend on the client’s preference. You'll be looking for any final spelling, punctuation, grammatical, and consistency errors that remain in the text. However, you'll also expected to check the appearance of the text.

Checks will include the following:


  • the running heads match the chapter title
  • the chapter title matches the entry in the contents list
  • the design of the various text elements is consistent (e.g. correct font, text size, use of bold/italic, consistent capitalization, correct paragraph indentation, line spacing, etc.)
  • the chapter title drops are consistent throughout
  • the text on facing rectos and versos (right-hand and left-hand pages) is balanced
  • in-text citations are presented according to preferred style and can be located in the book's references or bibliography
  • footnote/endnote markers are present and correct in text and correspond to relevant footnotes/endnotes
  • odd page numbers always appear on recto pages
  • bad word breaks are flagged
  • part titles always appear on new recto pages

​​This isn't a comprehensive list but it gives you an idea of how this type of proofreading goes beyond just checking the text for typos. If your client hasn’t supplied you with a proofreading checklist, you can access this free one when you sign up for The Editorial Letter.
Proofreading checklist
CLICK IMAGE TO ACCESS
What's important here is that every amendment you suggest might have an impact somewhere else. That doesn’t mean you shouldn’t make the amendment; it means, rather, that you need to be mindful of the consequences of your actions – the knock-on effects.

What are knock-on effects?
Professional proofreaders often refer to the indirect consequences of their mark-up as knock-on effects. A useful way of thinking about this is in terms of dominoes because it provides us with the perfect description of what’s at stake.

Imagine you've lined up four dominos: A, B, C, and D. You push over A and it pushes over B. B then knocks over C, which in turn causes D to fall. Domino D’s topple was caused indirectly by Domino A, even though A didn’t touch D.

This process can occur on page proofs and can have serious consequences. The changes we make can, if we’re not careful, impact on the text flow, the pagination, the contents list, and the index.
Beware of the domino effect when proofreading
An example
Here’s an example to illustrate the point. Imagine the publisher’s brief tasks the proofreader with attending to orphans and widows (those stranded single lines at the bottom or top of a page).

Solutions that involve instructing a typesetter to shuffle a line backward to a previous page, or forward to the next page, in order to avoid the widow/orphan might cause one, or all, of the following problems:
​
  • The repositioning of a line onto a different page automatically forces a reflow of text. Things look fine for the next six pages, but on the seventh page after the amendment was made, a new orphaned or widowed line has now appeared. The previous arrangement of the text prevented this.
  • Let’s imagine that the seventh page is still widow/orphan-free. But the reflow of text means that this seventh page now contains a line that appeared on the previous page. This line includes a keyword term that is cross-referenced 130 pages later. The cross-reference is now incorrect.
  • The index is being created simultaneously by a professional indexer. It’s not uncommon for proofreaders to never see the index, nor to spot check it. The line that’s been repositioned on a different page contains an author citation that is included in the index. The indexer doesn’t know what the proofreader’s done, and the proofreader doesn’t know which terms are being included in the index. Neither of them knows that the index entry now has the wrong page number attached to it.

In all three cases, the proofreader has prevented one problem but caused others. Consequently, good practice involves more than blindly placing mark-up instruction on any given page.

Thought needs to be given to how the problem can be tackled and the impact managed so that there is no knock-on effect. Spotting an orphaned or widowed line is not enough. We might also have to consider the following:

  • Providing additional instructions to the typesetter regarding to how to manage the problem by compensating elsewhere on the page (e.g., increasing or reducing line spaces and page depths, new line creation, etc.) so that the impact of moving one line is restricted to the page where the change has been made and its facing recto/verso.
  • Telling the project manager about the suggested line move so that the manager can inform the indexer.
  • Looking out for obvious key words or citations in lines that have been moved to check whether they are cross-referenced in the text (having a PDF, even when working on hard copy, is a must in these circumstances).

Summing up
If you’re considering training as a proofreader and want to be fit for the purpose of marking up page proofs, check that your course includes a component about knock-on effects.

Even when we are supplied with detailed briefs about an ideal layout, the publisher client expects us to be mindful of the consequences of our amendments. The proofreader’s job is to find solutions to problems in ways that don’t cause unintended damage.
Louise Harnby is a line editor, copyeditor and proofreader who specializes in working with crime, mystery, suspense and thriller writers.

She is an Advanced Professional Member of the Chartered Institute of Editing and Proofreading (CIEP), a member of ACES, a Partner Member of The Alliance of Independent Authors (ALLi), and co-hosts The Editing Podcast.

Visit her business website at Louise Harnby | Fiction Editor & Proofreader, say hello on Twitter at @LouiseHarnby, connect via Facebook and LinkedIn, and check out her books and courses.
0 Comments

Q&A with Louise: Can you proofread professionally with a tablet?

13/7/2017

4 Comments

 
This question is from Alison, who’s new to proofreading and still completing her professional training with one of the UK's industry-recognized bodies.
Picture
Picture
‘I would be very interested to hear your thoughts on the iPad Pro 12.9" with a stylus as a proofreading tool. I am currently using my MacBook Air.’

That’s a great question, Alison. Here’s my take on the situation:

Broadly speaking, I wouldn’t recommend a tablet as a primary professional proofreading tool because I think you’ll struggle to match the functionality available on a laptop or desktop computer.

That doesn’t mean you can’t use it in your home office to increase your screen real estate – perhaps for fact checking, referring to an onscreen style guide, displaying your online dictionary, or checking emails.

Overall, though, I think there are too many limitations for the pro proofreader. Here are some thoughts …

Proofreading and tangled terminology
Your professional training will distinguish between proofreading (annotating designed pages – page proofs) and copyediting (correcting the raw text).

This distinction will match the expectations of many traditional publishing houses, though not all.

I’ve worked for two publishers in my career whose ‘proofreading’ required me to edit raw text. We might call it a light edit, or a proofedit, or just stop beating about the bush and use the term copyedit!

What we’re talking about here is a quality-control check prior to publication. And it’s done in Word.

In this case, you’ll not be scribbling hieroglyphics on your tablet with your stylus; you’ll be directly amending the file.

iPads and Word files
I have an iPad Air. I love it for email, search, messaging, reading, listening to music and audiobooks, social media and gaming. I also like it for writing – drafting anyway. But I wouldn’t use it as a professional proofreading tool if you paid me (unless you paid me a lot to compensate for how much slower I’m going to be!).

The screen size is still too small for one thing. Now, it’s not necessary to have two mammoth screens, but I like mine! I’m happy to work on my 15” laptop when required, but that’s as low as I’ll go. The more I can fit on a screen the less I have to scroll. And that reduces the strain on my wrist.

There is a lot of functionality in the app, but I just don’t think it’s anywhere near as quick or accessible as when one’s working on a laptop or desktop. Making a decent living from professional proofreading means taking advantage of complementary efficiency and productivity tools wherever possible.

Basics like find/replace, wildcard searches, keyboard shortcuts, and the styles palette should speed you up, not slow you down.

But the biggest downside is what you’ll lose from not being able to run a whole suite of gorgeous macros that will make your life easier and improve the quality of your proofread.
​
  • StyleWriter for iPad. Doesn’t exist.
  • EditTools for iPad. Doesn’t exist.
  • Macros for Editors (Paul Beverley) … the iPad version. Doesn’t exist

You get the point!

Thus, the iPad is not a contender for working in Word for many professionals. 


Here's some good news though. PerfectIt for Cloud is now available and works with Windows and iOS, so you can run it on a tablet. I've yet to test it, but it is doable.
iPads and PDFs
Whom you’re working for will affect things here.

If you proofread for publishers, you’ll likely be asked to work on designed-for-print page proofs. This presents a number of challenges on a tablet.

Even on a larger tablet like the one you’re considering, you won’t get a clear view of a facing recto and verso. And that means you won’t be able to check quickly for unequal page depths.

Then there are the comment and mark-up tools to consider. A stylus is great if you want to use industry-standard proofreading marks, though it’ll need to be a high-quality stylus with a fine nib if your marks are to conform to BSI 5621C.

I’ve experimented with a stylus and it wasn’t as easy as I’d hoped to annotate a PDF to professional standards. I wasted time ensuring each symbol was clear and neat, whereas if I’d been working on paper or on a laptop using digital BSI stamps, I’d have already moved on to the next annotation. Just something to bear in mind – practice will be essential if you experiment with tablet/stylus markup.

Talking of stamps, you can mark up a PDF on a laptop or desktop (Mac or PC) using digital symbols. I provide a free set (see More Resources below).

I want to mention the search function, too. One of the things I like best about marking up a PDF is the ability to do global searches for repeated errors. And while the search tool is quite neat on a tablet, it doesn’t have the range of functionality that you’d find on a laptop or desktop, particularly if you’re using pro versions of Acrobat or PDF-XChange.

And, yes, the comment and markup tools, and the bookmarking are there in the app, and again quite neat if you’re working on a basic file with very little text for a non-publisher client. But for an 80,000-word book in which you might have to make hundreds of changes, I think you’ll struggle.

Overall, the issue is one of speed. There’s a lot you can do on an iPad but I don’t think tablets in general are designed to let you move efficiently around a designed book page in the way a professional proofreader needs to.

I want to be able to see a double-page spread at a glance. Yes, I’ll need to inspect the text word by word, line by line, but I also want to be able to view the page as a whole, including its running heads, its margin and line spacing, the position of all of the various elements and whether they’re aesthetically pleasing.

I want to be able to bounce around on one page, and back and forth between pages via bookmarks, without keyboards and windows popping up all over the place while I’m working! That just slows me down, and in an age when many mainstream publishers are feeling the pinch and increasing their freelance editing rates only marginally each year, smart proofreading is essential. The more efficient you are, the better the hourly rate you’ll earn.

I recommend you stick with your MacBook Air. My friend and colleague John Espirian concurs:

'My iPad is a wonderful writing platform but I wouldn't use it for editing or proofreading in any professional capacity. A MacBook is going to win hands down on that score. I write all of my blog drafts in Byword on my iPad. I use Apple's Smart Keyboard (see More Resources for a review). 

And unless you're location-independent and need to carry as little as possible, treat yourself to a second screen.

I wish you good luck with your training, Alison!
 
More resources
  • Working with two screens
  • Not all proofreading is the same: Part 1. Working with page proofs
  • Not all proofreading is the same: Part 2. Working directly in Word
  • PDF Editing – Making the Most of the Stamps Tool​
Louise Harnby is a line editor, copyeditor and proofreader who specializes in working with crime, mystery, suspense and thriller writers.

She is an Advanced Professional Member of the Chartered Institute of Editing and Proofreading (CIEP), a member of ACES, a Partner Member of The Alliance of Independent Authors (ALLi), and co-hosts The Editing Podcast.

Visit her business website at Louise Harnby | Fiction Editor & Proofreader, say hello on Twitter at @LouiseHarnby, connect via Facebook and LinkedIn, and check out her books and courses.
4 Comments

PDF proofreading – essential first-step checks

1/12/2015

0 Comments

 
If you're starting out on your journey as a professional proofreader and you're marking up PDF proofs, this one's for you.
PDF proofreading
Picture
​There was a time when if a publisher commissioned me for a proofreading project I could expect a large, heavy parcel of paper to turn up in the mailbox. The parcel would contain at least the final page proofs (see Not all proofreading is the same: Part I – Working with page proofs).

If I was required to proofread against copy, the parcel would also include the galley proofs (a printed copy of the pages of raw text supplied by the author on which the copy-editor had marked initial corrections).

Paper proofreading is an expensive business before the publisher has even paid the editorial freelancer’s invoice. And it’s a double whammy – the client has to pay for the proofs (and possibly the galleys) to be delivered to the proofreader, and it has to bear the costs of the return postage.

I’ve worked on large academic books in the past that incurred postage and packaging costs of over £70 per proofreading project. And let’s not talk about the cost of paper and ink.

It’s not surprising, then, that some publishers and project-management agencies have embraced cost-effective solutions. PDF markup has proved to be an effective alternative. Digital delivery costs nothing as long as the client and proofreader already have internet access.

It’s not just good news for the client – the proofreader benefits, too. I live in rural Norfolk and have to drive to my nearest post office. That’s time that I can’t bill for, not to mention the wear and tear on my car (though HM Revenue & Customs does have a mileage allowance). Even so, I have better things to do.

Visits to the post office aside, many proofreaders have found PDF proofreading to be a more efficient task than paper-based work. For those of us working for publishers on a fixed-fee basis per project, this means a better hourly rate.

Given that some publishers haven’t increased their freelance rates for many years (or have done so but only minimally), such efficiencies can mean the difference for the proofreader between continuing the working relationship and waving goodbye to the client.

The proofreader’s options for PDF markup
Most PDF editing software includes onboard commenting and markup tools for annotation purposes so that the proofreader can:
  • mark for insertion, deletion and underlining
  • draw basic shapes and lines
  • highlight and comment
  • attach sticky notes
  • pin files
  • type text and specific instructions to the designer (this typed text can itself be formatted in terms of font, size, alignment and colour, and it can be italicized, emboldened, underlined or struck out)

Stamps (digital proofreading marks) are another option. See 'The Proofreader’s Corner: Using the Stamping Tool for PDF Proofreading Mark-up', An American Editor, September 2015, for an overview of the subject.

The Working Onscreen archive on The Editing Blog has other related content that may be of interest to new entrants to the field.

Platforms include (but are not limited to): Futureproofs (client pays for use of platform), PDF-XChange (considerably cheaper and trusted alternative to Acrobat Pro with excellent functionality), Acrobat Professional (well-known and trusted but expensive) and Adobe Reader (free, and increasingly user-friendly. Latest version is DC).

Potential pitfalls to avoid
Onscreen proofreading can save the proofreader and the client time and money, but there are a number of pre-project steps that should be taken to ensure that the final outcome is a happy experience for all parties.

Making assumptions based on your own preferences, or your colleagues’ experiences, could lead to readability and compatibility problems.

Ask your client what they want
Ask your client what their preferences are rather than making assumptions. Be prepared to be flexible.

Some publishers have streamlined their production processes and have a strict set of guidelines concerning which annotation tools should be used for digital proofreading.

Some clients will be happy for you to use digital stamps based on publishing-industry-recognized markup symbols. Others might insist on sticking to a particular PDF editor’s onboard comment-and-markup tools. Yet others may expect a mixture of both.

Some may even want you to actually edit, rather than just annotate, the PDF (though this is very risky as it could interfere drastically with the layout of professionally typeset page proofs).

Some publishers are experimenting with Futureproofs (which has its own onboard markup system – for a review, see my article Digital proofreading using Futureproofs, November 2015).

I merrily used the onboard commenting tool for a Spanish business client for two years, assuming wrongly that she wouldn't have a clue what the British Standards Institution proof-correction symbols were. She then surprised me by asking whether I knew how to use the “more efficient standard proofreading markup language”. I was happy to oblige, using stamps, because it was quicker for me, but I’d wasted precious time for two years because I’d made a flawed assumption.

Test the platform
Once you've agreed with your client on how you will mark up the PDF, do a small test to check that both of you are seeing the same annotations and that the markup “sticks” during the delivery process.

For example, I wanted to use the stamping tool in PDF-XChange on a recent project with a new client. We agreed in principle that this was acceptable.
​
  • I extracted one page from the PDF page proofs and annotated it using several different stamps, the onboard commenting tool and the onboard strike-through, polygon and highlighting tools.
  • I then saved the page and opened it up in my recently downloaded version of Adobe Reader DC. All looked well.
  • I then compiled a list of all the test changes I’d made (briefly describing the actions and the line/paragraph where they occurred: for example, highlight [word] on line 2, paragraph 2; comment at line 4, paragraph 2; delete stamp in margin and strike-through [word] in text at line, 9, paragraph 3).
  • I emailed the list and the marked-up PDF page to my client. He confirmed that all the markup appeared as it should on the software he was using.

I then felt confident to continue the proofread as planned.

File size
Some marked-up PDFs can be huge.

A client once sent me a PDF of 2,329 KB. By the time I'd stamped it, it was 25,395 KB (I zipped it down to 23,646 KB). 

If your email provider won’t handle large files, you will need to agree an alternative delivery system with your client.

Examples could include setting up a shared file in Dropbox, uploading directly to the client’s ftp site or using the likes of FileZilla, or transferring via an internet-based service such as WeTransfer.

Again, don’t assume that what suits you will suit your client. One of my project managers was happy in principle to use Dropbox (which I have) but then found out via her IT department that she wasn’t allowed to download the software to her PC. We had to work out an alternative.

Up-to-date software
Keep your software up to date. Perhaps Acrobat Standard (version 9) or PDF-XChange Viewer worked for you and your clients three years ago. However, the clients you’ve inherited recently are working with different software or more updated versions of existing tools. Installing regular updates and upgrading to the latest versions can help to reduce the risk of compatibility and readability issues at either your end or your client’s.

Resource guide
  • Article: Onscreen proofreading tips: Reorganizing your stamps palette in PDF-XChange
  • Article: PDF Editing — Making the Most of the Stamps Tool
  • Article: Six Tips for Ergonomic PDF Proofreading
  • Course: In the UK, the CIEP and The Publishing Training Centre, to give just two examples, include onscreen markup as part of their broader distance-learning proofreading training
  • Resource hub: The Working Onscreen archive  provides links to, and articles about, digital work flows more broadly
  • Stamps: If you want to use the BS 5261C:2005 proof-correction marks to annotate a PDF, visit Roundup: PDF Proofreading Stamps (quick-access links). This provides the access links to a full set of downloadable PDF proofreading stamps in black, blue, and red, as well as the installation instructions
  • Stamps: US stamps files are available via the Copyediting-L site, under the Resources tab. Scroll down to “Diana Stirling’s (2008) editing marks for PDF documents (Zip documents)”
  • Checklist: How to check page proofs like a pro (a free copy is available when you sign up to The Editorial Letter)
Picture
Louise Harnby is a line editor, copyeditor and proofreader who specializes in working with crime, mystery, suspense and thriller writers.

She is an Advanced Professional Member of the Chartered Institute of Editing and Proofreading (CIEP), a member of ACES, a Partner Member of The Alliance of Independent Authors (ALLi), and co-hosts The Editing Podcast.

  • Get in touch: Louise Harnby | Fiction Editor & Proofreader
  • Connect: Twitter at @LouiseHarnby, Facebook and LinkedIn
  • Learn: Books and courses
  • Discover: Resources for authors and editors
0 Comments

Creating your own proofreading stamps for PFD mark-up

13/10/2015

0 Comments

 
In this article, I show you how to create your own digital proofreading stamps for PDF proofreading and editing.
Picture
Picture
A caveat
I’m based in the UK so I’ll be referring to the British Standards Institution’s (BSI) BS 5261C:2005 'Marks for Copy Preparation and Proof Correction' throughout this article (readers can buy a hard-copy list of these marks from the Society for Editors and Proofreaders).

You might be used to seeing different symbols to indicate the same instructions. That’s because, depending on where you live, different standards may apply.
​
Compare, e.g., the Canadian Translation Bureau and BSI marks for a selection of instructions:
Picture
What matters is not which proof-correction language you use, but what your client requires.
 
Recap of existing digital resources
If you want to use the BS 5261C:2005 proof-correction marks to annotate a PDF, visit Roundup: PDF Proofreading Stamps (quick-access links). This provides the access links to a full set of downloadable PDF proofreading stamps in black, blue, and red, as well as the installation instructions.

US stamps files are available via the Copyediting-L site, under the Resources tab. Scroll down to 'Diana Stirling’s (2008) editing marks for PDF documents (Zip documents)'.

Finally, search the Editing Tools section of Katharine O’Moore-Klopf’s Copyeditors’ Knowledge Base using the key words 'PDF Editing Stamps'. This will bring up a number of other useful resources.

Why might I need to make my own stamps?
You might wish to create your own stamps for three reasons:
​
  • The standard symbols required by your client might not be available for use on PDF. Use the resources in the above recap section in order to identify whether the mark-up language you want to work with is available digitally.

  • The existing digital resources might include only the standard symbols developed by the original issuer (BSI, CMOS, CTB, etc.). However, I’ve sometimes found that I’m repeatedly making a particular amendment that isn’t covered by these standards.

    ​For instance, a nonnative-English-speaking author may use the word 'is' when the author means 'are' repeatedly in a file. Rather than annotating the PDF using the typewriter tool for the text, and using the Replace symbol (slash mark) for each correction, it could be more efficient to create a new stamp that incorporates the text and slash mark.

    ​In the stamps files I provide, I’ve created several nonstandard symbols that I thought would be of benefit to users, including:
Picture
  • For the sake of efficiency, you might wish to modify two existing standard digital marks. For example, I often need to change a hyphen to an en rule, and I have to stamp two symbols in the margin – the En-rule mark followed by the Replace mark. I decided to create a single symbol that incorporates both of these marks (this symbol is included in the digital stamps files that I make freely available here on my blog).
Picture
When we modify standard stamps in this way, we save time – every second we save stamping only one symbol rather than two adds up to significant increases in productivity.

Creating your own stamps
There are two ways to go about creating your own customized stamps.

First method
You can using a free snipping tool to copy a mark that you’ve drawn, typed, or found online. If I want to create a new stamp – for example, the 'change is to are' instruction mentioned above – I can use my PDF editor’s comment-and-markup tools to type the word 'are' and stamp a Replace symbol after it.

Then I simply click on my snipping tool, select 'New', and drag the cursor over the marks I’ve made. I then save this as a PNG, GIF, or JPEG. The image is now available for upload into my PDF Editor’s stamps palette.

In Windows 10, the snipping tool looks like this:
Picture
Where your snipping tool is located will depend on which version of Windows you’re using.

The advantage of using a snipping tool is that it’s very efficient. I’ve pinned my onboard Windows snipping tool to the task bar at the bottom of my screen, so it’s always accessible. If you are using an operating system that doesn’t include a snipping tool, there are of alternatives available online.
​
There are disadvantages to using this method:

  • The definition of a snipped stamp is poor in comparison with a symbol drawn in a desktop publishing (DTP) or professional graphics program. The images usually look fuzzy, especially when enlarged.
  • It’s not possible to control the size of the snipped image, so the symbol may have to be resized every time it’s stamped in the margin, which wastes time.
  • Snipped stamps don’t have transparent backgrounds. This can be aesthetically unpleasing when you are stamping onto tinted pages. If you’ve created a stamp that needs to be placed in-text on a PDF, the lack of transparency will cause problems because you’ll be masking content that your client won’t want to be hidden.

Using the snipping tool to create stamps is recommended if you need a quick solution and you don’t think you’ll need to use the new symbol in future jobs. If you do think you’ll use your new symbol time and time again, it might be worth considering the second method.

Second method
You can use a DTP program such as Microsoft Publisher, Adobe InDesign, and QuarkXPress, or a graphics program like CorelDraw and Adobe Illustrator. I use MS Publisher because it’s included in my MS Office bundle. I’ve also found it quite easy to use – this is partly because it’s entry-level DTP software and partly because it’s an MS product so the functionality is quite similar to that of MS Word.

Once you’ve drawn your new symbol in your DTP program, you need to save the document as a PDF. This can usually be done very simply, using the 'Save as' function. The image will then be ready for upload into your PDF editor’s stamps palette.

The disadvantage of using this method is that it requires greater investment in time in the short run. I’d only recommend it if you are creating a stamp that you think will be useful for many jobs to come.

The advantages of going down the DTP route are:

  • The finish of the stamp is more professional – the images are much sharper than the snipped versions.
  • You can draw multiple stamps in a single DTP document – just make sure that each image is drawn on a new page. Then you have to save one document as a PDF from which you’ll upload your new stamps.
  • You can control the size of the stamp. This may take some experimentation, but once you’ve drawn one proof-correction mark that you know produces a stamp that you can universally use on PDFs without having to resize, you can use this as a template for any future stamps you create.
  • You can control the transparency of the stamp. Users of my stamps files will know that some of my symbols don’t have fully transparent backgrounds. This is something I plan to rectify when I have time!

Using a DTP/graphics program is more time consuming but gives a more professional finish and is worth it if you think you’ll use the new symbol in multiple jobs.

Saving and installing your new stamps
If you have used the snipping tool to create a new GIF, JPEG, or PNG stamp, you can save it wherever you wish. I usually choose the Downloads folder. Then open your PDF editor and upload the stamp.

Installing snipped images to PDF-XChange
  • Open the PDF you wish to mark up
  • From Menu: Tools > Comment and Markup Tools > Show Stamps Palette
  • From Stamps Palette: Click on an existing Collection or create a new one (using the New button with a small green cross); select 'From Image'
  • From a browser window: Locate your image from the folder in which you saved it, e.g., Downloads, and choose 'Open'

Installing snipped images to Adobe Acrobat (v. 9)
  • Open the PDF you wish to mark up
  • Click on the stamp tool on the top ribbon
  • Select 'Create Custom Stamp'
  • From browser window: Locate your image from the folder in which you saved it, e.g., Downloads. Note that in Acrobat you will need to choose the relevant file type in order for your symbol to show up. So if you saved your snipped image as a PNG, you’ll need to select this from the drop-down menu under file type; 'Select'; 'OK'
  • You can now name your stamp and assign it to a Category (you can use an existing Category or create a new one, e.g., Proofreading)

Installing snipped images to Adobe Reader (v. XI)
I haven’t found a way to import snipped stamps into Reader; the only option is to upload stamps that have been saved as a PDF, which isn’t possible with the Windows snipping tool at least. Given that PDF-XChange is still a very affordable editor, with outstanding functionality, I’d recommend trying it as an alternative to the free Adobe Reader and the rather more expensive Acrobat Professional.

​Saving and installing DTP-created images
If you have used DTP software and saved your stamps in PDF format, you may need to save into a specific folder. The installation process is a little more complicated and will depend on the PDF editor you are using. If you are using PDF-XChange, Adobe Acrobat Professional, or Adobe Reader, carefully read the installation instructions I’ve provided on The Editing Blog.

Related reading …
If you are new to PDF proofreading, you might find the following links of interest:
​
  • PDF Editing – Making the most of the stamps tool
  • Using the Stamping Tool for PDF Proofreading Mark-up
  • Roundup: PDF proofreading stamps (quick-access links). This includes a link to my installation instructions; for PDF-XChange users, there’s a video tutorial as well as written instructions.
  • Onscreen proofreading tips: Reorganizing your stamps palette in PDF-XChange
  • Six Tips for Ergonomic PDF Proofreading
 
Louise Harnby is a line editor, copyeditor and proofreader who specializes in working with crime, mystery, suspense and thriller writers.

She is an Advanced Professional Member of the Chartered Institute of Editing and Proofreading (CIEP), a member of ACES, a Partner Member of The Alliance of Independent Authors (ALLi), and co-hosts The Editing Podcast.

Visit her business website at Louise Harnby | Fiction Editor & Proofreader, say hello on Twitter at @LouiseHarnby, connect via Facebook and LinkedIn, and check out her books and courses.
0 Comments

Using the stamping tool for PDF proofreading mark-up

28/9/2015

0 Comments

 
In this article, I provide an overview of PDF proofreading mark-up using the stamping tool.
Picture
Picture
When I first started my business, I was strictly a proofreader and most of my work was on paper.

Back in 2006, I was working primarily for publishers. These clients often wanted me to proofread against copy rather than blind. That meant that I was receiving large packages through the mail containing not only the final page proofs but also the galley proofs.

Postage costs were huge, though my clients bore the cost; but I still had to factor in the time I spent either waiting for couriers or hopping into my car and driving to the post office so that I could return the galleys and marked-up proofs.

These days, things are different. Most publishers have embraced digital mark-up. I'm still required to work on final page proofs, and the clients still like me to annotate using UK-industry-standard mark-up language, but I can do it all onscreen – using my PDF editor’s commenting and mark-up tools – and the stamping tool.

This saves the publisher money by eliminating postage costs and removing the need to print hundreds of pages of hard copy. It also saves me time, and, for those of us in the business of editorial freelancing, time is money.

Most editorial professionals have already embraced digital mark-up (either on PDF or in Word). Little of what follows may be news to them. Even though this article is aimed at the novice who's in the process of investigating digital workflows and the tools available to assist them, experienced professionals, and professionals seeking to expand into proofreading, are likely to find the information valuable.

Two caveats
First, I’m based in the UK. If you’re from elsewhere, you might not recognize some of the symbols shown in this post. That’s not because the symbols are wrong, but because there are differences in mark-up language between countries.

The British Standards Institution has issued the BS 5261C:2005 ‘Marks for Copy Preparation and Proof Correction’ (readers can buy a hard-copy list of these marks from the Chartered Institute of Editing and Proofreading (CIEP) and that’s what my publisher clients expect to see. Your clients might have different expectations.
​
Second, stamping tools can be used in a number of different PDF editors. My own preference is PDF-XChange (from Tracker Software). Some of my colleagues prefer Tracker’s PDF Editor. Others, still, use Adobe Acrobat Professional or Adobe Reader.

​If you’re not sure what suits you best, take advantage of the various free trials on offer.

For demonstration purposes, some of the screenshots in this essay are based on working in PDF-XChange. However, the underlying principles are the same.

What are proofreading stamps?
Proofreading stamps are simply digital versions of the symbols you would draw by hand on a paper proof. Below is a screenshot of some of the BS 5261C:2005 symbols that UK proofreaders use.
Proofreading marks UK
The screenshot above shows a partial view of the PDF-XChange stamps palette. I’ve chosen to number the symbols, rather than naming them, because this allows me to change the order easily (see Onscreen proofreading tips: Reorganizing your stamps palette in PDF-XChange).

Each symbol in a palette can be selected and then stamped onto a PDF using the relevant tool, usually accessed through the PDF editor’s comment-and-mark-up toolbar.
​
Below, the stamping tool in PDF-XChange is circled:
Picture
Here’s what it looks like in Adobe Reader:
Picture
And, finally, below is a screenshot from Adobe Acrobat 9:
Picture
​The answer is not actually as straightforward as one might hope! As far as I’m aware, my Irish and Australian colleagues find the BS 5261C:2005 symbols acceptable (feel free to correct me if I’m mistaken); in the UK, these BSI marks are absolutely considered standard.

​However, my Canadian colleague Adrienne Montgomerie, in her essay ‘The Secret Code of Proofreaders‘ (Copyediting, October 15, 2014), points out that for editorial professionals in parts of North America ‘[t]he challenge is always whether or not the designer will understand the marks. It’s hard to say that there are standard marks.’

She goes on to illustrate the differences between the Canadian Translation Bureau’s Canadian Style guide marks and the marks preferred by the Chicago Manual of Style.

The best advice I can give to novices is that they check with their national editorial society and their clients before embarking on this type of work.

Why use mark-up language on digital proofs?
Using stamps isn’t the only way to mark up a PDF, of course. Some of my colleagues’ clients prefer sole use of the commenting and mark-up tools embedded in their PDF editors.

When I use the stamping tool, it’s because my client wants to see all the suggested corrections in the page-proof margin (just like with a hard-copy proofread) rather than in pop-ups (see the example later in this article under ‘What does a stamped PDF proof look like?’). Ask your client what they prefer.

In ‘Are proof-correction marks redundant? Not even close!' – an introductory guide to using proofreading mark-up symbols – I consider the issue of why these little hieroglyphics are useful. If you’re new to proofreading, you might like to read the article in full. For the purposes of this article, the key points can be summarized as follows:
​
  • If your client wants all the annotation in the margins of the page proofs, there’s very little room in which to work. Specialized mark-up language, even when working digitally, is an efficient way to tell the typesetter/designer what to do.
  • The ability to use professional mark-up language, when required to do so by a client, demonstrates professionalism. Some editorial societies’ codes of practice demand knowledge of standard mark-up language. See, e.g., The Australian standards for editing practice, 2nd ed. (2013); Chartered Institute of Editing and Proofreading (CIEP) Code of practice; and Editors Canada’s Professional Editorial Standards: ‘E. Standards for Proofreading‘
  • Stamping a symbol on a PDF, or drawing a symbol on paper, is quicker than writing out an instruction. Being able to mark up in this way can therefore increase efficiency and productivity. If you’re working for fixed fees, it’s a timesaver and money-earner.
  • If you don’t understand how to mark up using this specialist language, you’re marketable to fewer clients. It therefore makes good business sense to acquire the skills to mark up in this manner, both on paper and digitally.

Where can I find digital stamps?
If you want to use the BS 5261C:2005 proof-correction marks to annotate a PDF, you can find everything you need on this site in the Stamps archive. In particular, Roundup: PDF Proofreading Stamps (quick-access links) provides the access links to a full set of downloadable PDF proofreading stamps and the installation instructions.

U.S. stamps files are available via the Copyediting-L site, under the Resources tab. Scroll down to ‘Diana Stirling’s (2008) editing marks for PDF documents (Zip documents)’.

Finally, search the Editing Tools section of Katharine O’Moore-Klopf’s Copyeditors’ Knowledge Base using the key words ‘PDF Editing Stamps.’ This will bring up a number of useful resources that you might prefer to try.

Where can I learn onscreen mark-up?
If you’re already familiar with standard proof-correction marks, and have used them extensively on paper-based projects, you might well be able to teach yourself to mark up onscreen with stamps. That’s how I went about building my digital mark-up skillset.

However, if you’re a novice or lack confidence, you might prefer more formal training that introduces you to using proof-correction language correctly and clearly (whether on paper or digitally).
​
In the UK, the Chartered Institute of Editing and Proofreading (CIEP) and The Publishing Training Centre, to give just two examples, include onscreen mark-up as part of their distance-learning proofreading training.

Denise Cowle has a self-paced course called How to Mark Up PDF Page Proofs: Best practice for editors and proofreader. 
​
There's also some good, and free, online guidance on the Right Angels and Polo Bears blog under the PDF Mark-up for Editors tab. See also the Stamps and Working Onscreen archives on this blog.

What does a stamped PDF proof look like?
A PDF that’s been marked up using proof-correction stamps looks just like its paper cousin – the only difference is that it’s in a file on your computer rather than in a pile on your desk.

​As you can see from the sample below, you can, of course, use the onboard tools. Here, I’ve added in a query for the author (using the Commenting function); if, however, my client had wanted all annotation to be viewable in the margins, I’d have created a separate query sheet to communicate my concern with the highlighted spelling issue.
Picture
Summing up
Proof-correction marks are not a thing of the past — far from it. Whether you are working on paper or onscreen, being able to offer this method of annotating a proof is a valuable business asset. It gives both you and your clients choices.

There will be times when a client will prefer you to work on paper, or directly in Word. And there will be times when you work with clients who don’t know the meaning of proof-correction symbols, and will ask you instead to use a PDF editor’s onboard commenting and markup tools.

​However, if you are going to be working with clients who want a traditional margin-based proofreading service (where all your annotations are made on the typeset page) but in a digital format, the ability to mark up using proofreading stamps will serve you well.
Louise Harnby is a line editor, copyeditor and proofreader who specializes in working with crime, mystery, suspense and thriller writers.

She is an Advanced Professional Member of the Chartered Institute of Editing and Proofreading (CIEP), a member of ACES, a Partner Member of The Alliance of Independent Authors (ALLi), and co-hosts The Editing Podcast.

Visit her business website at Louise Harnby | Fiction Editor & Proofreader, say hello on Twitter at @LouiseHarnby, connect via Facebook and LinkedIn, and check out her books and courses.
0 Comments

Onscreen proofreading tips: Reorganizing your stamps palette in PDF-XChange

17/6/2015

1 Comment

 
In this post I show you how to reorganize the display of your digital proofreading stamps in PDF-XChange so you can improve the efficiency with which you work.
PDF Proofreading Stamps Palette
Picture
The free digital stamps files I’ve provided here on The Editing Blog contain over 70 individual images, all based on the British Standards Institution’s “Marks for copy preparation and proof correction” (BS 5261C:2005).

​The issue for many newbies is that the palette can appear cumbersome – we all work in different ways, and the symbols that we most often use may not be positioned in the most convenient place for our particular needs.

Having the full palette open on the screen takes up a lot of space, even if, like me, you use multiple screens. I prefer to have my palette near the text because it’s quicker to access, thus increasing my efficiency:
Picture
Picture
Decreasing the size of the palette is one option, and allows placement on the screen that won’t interfere with the text. However, this requires using the scroll bar on the palette in order to access the stamps located further down the palette, reducing efficiency further because not all the stamps are on display.

Reorganizing the stamps for your own needs 
When I created the original stamps files, I ordered them according to what my specific needs were at that time. But my preferences have changed since 2012, and it’s not unusual for my current preferences to change on a job-by-job or client-by-client basis.

For example, one particular client for whom I work provides me with PDFs that frequently require the use of the Turn over character(s)/word(s)/line(s) symbol. This symbol is located near the end of the downloadable stamps files. This meant that when I first opened up the palette in XChange it appeared as follows (see highlighted area at the bottom of the image below):
Picture
The solution is to move the frequently used symbol to the top of the palette for this particular client work. This is most simply done by renaming the stamp in a way that forces it into the required position. My preference is to name most of my stamps with numbers rather than descriptive names (see image above and compare the often-used Delete symbol (named 1) with the rarely used Change to small caps mark (named 9.83).

The beauty of renaming with numbers is that you have the freedom to move any stamp anywhere at any time. You can change the positions as and when you wish. For demonstration purposes, I’ve chosen to move the right-hand margin Turn over symbol to the top of the palette and place it next to the Delete symbol.

The process is quick and simple:

1) Left-click on the symbol you want to move. The area below the mark, where the symbol's name is located, will appear with an orange tint.
Picture
2) Move your mouse to the top of the palette and left-click on the “Rename” tab. A window will appear, housing the stamp’s current name.
Picture
3) Type in a new numbered name that will force the stamp into the numerically ordered position you desire. In this case, I want the Turn over symbol to appear next to the Delete symbol. Delete is named “1”; the stamp to the left is named “0.52”. Choosing any number between 0.52 and 1 for Turn over will therefore ensure preferred placement. I decide to rename Turn over as “0.99”. I type in the number and select “OK”.
Picture
4) Note that the stamp has been renamed but it still hasn’t moved into its new position.
Picture
In order to force the repositioning, I need to move out of the currently displayed palette and then reopen it. This can be done in two ways. Either close the palette completely by clicking on the X in the top-right-hand corner of the window (then reopen via the menu: Tools>Comment And Markup Tools>Show Stamps Palette) …
Picture
… or switch to a different Collection and then move back into the original Collection in which you renamed your stamp. The Collections can be found on the left-hand sidebar of the XChange palette, and you can move this sidebar in and out of view by clicking on and dragging the thick grey line, as highlighted below.
Picture
5) When you reopen the palette and click on the appropriate Collection, you’ll see your renamed stamp positioned exactly where you want it. To move the Collections sidebar out of view, simply click and drag on the grey line. This will provide more space in which to display all your proofreading symbols.
Picture
Marginal gains for increased efficiency
If renaming stamps seems like a lot of effort for little reward, remember that marginal gains count for a lot with editorial work. This is why tools such as macros, shortcuts and find/replace are useful. The same applies to creating an efficient stamps palette.

Every second you spend scrolling to find the stamp you want adds up. Seconds become minutes, and minutes become hours. If you’re being paid per hour, and your client doesn’t have a top-line budget, it may not matter how long it takes you to do a job, nor that you’re working inefficiently.

However, many clients do have a top line, and many editorial professionals are working for fixed fees. Efficiency matters. Furthermore, some of us need to attend to the way in which we use our hands, wrists and arms repetitively when working onscreen.

Organizing a stamps palette in a way that is memorable to you, and enables the fastest possible access, speeds up the onscreen markup process and reduces physical strain.

If you haven’t got round to renaming your stamps numerically, try it and see whether it makes a difference.
​
Louise Harnby is a line editor, copyeditor and proofreader who specializes in working with crime, mystery, suspense and thriller writers.

She is an Advanced Professional Member of the Chartered Institute of Editing and Proofreading (CIEP), a member of ACES, a Partner Member of The Alliance of Independent Authors (ALLi), and co-hosts The Editing Podcast.

Visit her business website at Louise Harnby | Fiction Editor & Proofreader, say hello on Twitter at @LouiseHarnby, connect via Facebook and LinkedIn, and check out her books and courses.
1 Comment

Are proof-correction marks redundant? Not even close!

16/10/2014

1 Comment

 
Do we still need to learn how to use traditional proof-correction symbols given that most proofreading work is done onscreen these days?
Proofreading marks
Picture
My answer is an emphatic “Yes, you should learn them!”

As I'll show below, knowing how to use them will increase your efficiency, productivity, clarity, marketability, and professionalism.

Traditional proofreading: Checking typeset proofs
Many proofreaders work directly in Word, making actual changes to the text.

In my experience, it's primarily self-publishing authors, academics, students and businesses that commission such direct intervention; almost all of my publishers want me to use the proof-correction symbols.

That’s because I’m not editing the text; rather, I’m annotating pages that have been professionally designed – the pages appear as I would expect to see them if I walked into a bookshop and pulled the published book from a shelf.

In this situation, I'm not just looking for spelling and grammar mistakes. I also need to annotate for problems with layout, for example:
​
  • misaligned text
  • incorrect indentation
  • inconsistent line or paragraph spacing
  • the wrong font
  • heading design problems
  • widows, orphans, and short lines
  • chapter-drop inconsistencies
  • incorrect positioning of different elements on a page, from boxes to images to tables
  • bad word breaks
  • recto word breaks

So, if you plan to work on page proofs that have been professionally typeset prior to publication, and you hope to acquire this work from mainstream publishing houses, you will need to know how to annotate the pages correctly with these symbols, even if you are proofreading onscreen.

What do the marks look like?
It depends where you live. If you need guidance about proof-correction marks in your particular region, contact your national editorial society. In some countries, the UK’s BSI marks are accepted for proofreading and copy-editing practice.

In the UK, there is a single set of industry-recognized symbols. These have been prepared by the British Standards Institution (BSI) and are entitled “Marks for copy preparation and proof correction”. Over time they’ve been updated. The current marks are identified as follows: BS 5261C:2005.

If you’re working for Canadian or US clients, read Adrienne Montgomerie’s article, “The Secret Code of Proofreaders” (Copyediting.com, 2014). As she points out, the Canadian Translation Bureau’s Canadian Style guide marks are quite different from the marks preferred by the Chicago Manual of Style.

Why are proof-correction marks useful? 
When we proofread typeset page proofs, there’s little room to indicate what we want to change. Recall that each page we’re working on appears almost as it would if the printed book had been published. 

Using industry-standard proof-correction marks is an efficient way to annotate the page with the desired corrections. The symbols are a short-cut code of instructions that tell the designer exactly what to do. Once you’ve learned all the symbols by heart, they’re much quicker to use than long-hand text and take up minimal space.

Open the nearest book you have to hand and look at how much white space there isn’t between the text and the margin – it’s not uncommon for me to work on page proofs with a 2cm margin either side of the text.

Notice, too, how small the space is above and below a single line of text.

The book has been designed and there's little room to annotate. 

Now imagine that in a given line there is a missing comma, a spelling mistake, and a word that needs decapitalizing.

The example below illustrates how these problems would be marked up using the BSI proof-correction symbols.

The long-hand alternative might be something on the lines of <Change “fax” to “fox”> in the left-hand margin, and <Insert comma after “grass” and decapitalize “Legs”> in the right-hand margin.

Given that we only have 2cm margins to play with, that each line is spaced closely to its neighbours above and below, and that in a real set of proofs there may be several corrections in multiple lines, any instructions to the typesetter are likely to become cluttered and confusing.

​Proof-correction symbols solve the problem.
Picture
The use of proof-correction symbols therefore offers increased efficiency, productivity, and clarity. And if you’re a proofreader-to-be who wants to ensure you’re marketable to as wide a range of clients as possible, acquiring the ability to use this mark-up process is a no-brainer.

Attending to professional standards
In addition to enabling you to work efficiently, productively, and clearly, and maximizing your marketability, there is also the issue of professionalism. Membership of a professional editorial society often requires knowledge of the relevant nationally approved mark-up symbols as a standard of good practice.
​
  • The Australian standards for editing practice, 2nd ed. (2013), states, "Editors should be up to date and proficient in the following: [...] A6.6 Standard mark-up symbols and conventions for copyediting and proofreading."
  • Chartered Institute of Editing and Proofreading (CIEP) Code of practice notes at section 5.6, Proofreading printed materials: Basic skills, "A proofreader should be competent in the following skills: [...] 5.6.4 Proof-correction symbols: Use current British Standard proof-correction symbols or terms, and colour coding for corrections (if required by the client) to permit accurate apportioning of costs."
  • The Editors' Association of Canada's Professional Editorial Standards: "E. Standards for Proofreading" says: "A professional proofreader requires a mastery of Part A: The Fundamentals of Editing and meets the following standards. [...] E16 When working on paper proofs, mark clearly and use standard proofreading marks unless another system has been agreed upon."

Where to find the UK marks 
The BSI provides a laminated 8-page summary sheet of all the marks you need to know for proofreading. Also included are short notes that enable the proofreader or copy-editor to identify the correct mark for both marginal and in-text mark-up, colour of ink to be used, and positioning of the symbols.

The CIEP has an arrangement with the BSI whereby members can purchase the sheet for a reduced price.

How to learn to use the marks
Any comprehensive proofreading course worth its salt should test your ability to use the marks according to industry standards. It's not just about using the right mark so that the instruction is unambiguous, but also about knowing when to use the mark and when to leave well enough alone.

In the UK, the CIEP and The Publishing Training Centre are examples of organizations offering industry-recognized courses that attend to these issues. If you live outside the UK, ask your national editorial society for guidance.

Further reading
If you’re considering embarking on a professional proofreading career, you might find the following related articles of use:
​
  • Proofreading checklist
  • Not all proofreading is the same: Part I – Working with page proofs 
  • Not all proofreading is the same: Part II – Working directly in Word
  • Does training matter? What publishers say about proofreading & editing courses 
  • Thoughts on proofreading and the art of leaving well enough alone
  • The proofreader’s corner: Page proofs and the domino effect
  • Proofreading: Using training to learn the appropriate mind-set 
  • Editorial business building books
  • Roundup: PDF proofreading stamps (quick-access links)
Louise Harnby is a line editor, copyeditor and proofreader who specializes in working with crime, mystery, suspense and thriller writers.

She is an Advanced Professional Member of the Chartered Institute of Editing and Proofreading (CIEP), a member of ACES, a Partner Member of The Alliance of Independent Authors (ALLi), and co-hosts The Editing Podcast.

Visit her business website at Louise Harnby | Fiction Editor & Proofreader, say hello on Twitter at @LouiseHarnby, connect via Facebook and LinkedIn, and check out her books and courses.
1 Comment

6 tips for ergonomic PDF proofreading

30/3/2012

12 Comments

 
If you’re proofreading onscreen, either with my proofreading stamps or your software’s comment and mark-up tools, it’s worth spending a few minutes to set up the various onscreen elements in an ergonomic fashion as well as familiarizing yourself with basic keyboard shortcuts.
6 tips for ergonomic PDF proofreading
Picture
Some aspects of onscreen work are speedier – searching for and implementing global changes, for example – while moving between the various mark-up tools is not as quick as using a hand and pen. There are, however, things you can do to compensate and make your onscreen experience more effective.

​
1. Make the toolbar work for you
Shift the most-used elements on your toolbar so that they are near to each other and on the side of the screen with which you operate your mouse. These elements might include the typewriter, mark-up tools, text tools, and stamp and save buttons. Use your mouse to click, hold and drag the elements across the toolbar ribbon.
toolbar
2. Use the stamps palette
Use stamps of proofreading symbols to complement the comment box and mark-up tools in your PDF editor. You can create your own or use the sets I’ve already developed. They’re available free of charge here. If you’re unfamiliar with these, see PDF Editing: Making the Most of the Stamps Tool.

Remember to keep your stamps palette open; it will save you time when selecting each stamp you want to use.

In XChange you can minimize the size of the symbols as they appear in the palette (see the highlight in the screenshot to the left). This enables you to see a greater number of stamps while you are working without having to scroll up and down the palette. In Acrobat, the palette is not as user-friendly, so use a second screen to get the best of the display.

In XChange, number similar stamps sequentially so that they appear in a logical order. This will make it easier to find the stamp you need, particularly if each palette contains a lot of symbols (If you’ve downloaded my XChange stamps simply change the number-name in order to re-sequence them).

It's useful to keep your palettes of different-coloured stamps separate so that the palettes don't become overly cluttered. Again, this will enable you to locate the stamp you need more efficiently. 
stamps palette
3. Hook up a second screen
I generally use a laptop, but I hook up my old desktop screen to enable me to use two screens at once when I’m doing onscreen work. This works well on three counts: 
  1. The desktop screen is larger, so it’s much more comfortable to work on. I can enlarge the PDF view to 150%, which displays most of the page on the screen while presenting the text in a size that’s easy on the eye. 
  2. A larger screen means you can expand your stamps palette in a way that will maximize the number of stamps on show without interfering with your PDF page. 
  3. It’s inconvenient and time-consuming when you want to write a query to the client only to have the comment box open up under another element, which then has to be moved. To avoid this, you can slide elements such as the Search window and Comments List over to the smaller screen so that they are visible and usable at all times, but not taking up the grey space where the comment boxes appear.

​4. Utilize basic keyboard shortcuts
These are my preferred keyboard shortcuts when working with PDFs. There are many, many more but I like these because all but one can be managed easily with one hand.

Alt Tab: this is one of my most-used keyboard short cuts and is especially useful if you only have one screen to work on and need to flit between different programs or files.  
Ctrl S: save
Ctrl C: copy
Ctrl X: cut
Ctrl V: paste
Ctrl Z: undo
Ctrl A: select all
Ctrl Shift F: opens search window

5. Bookmark key pages
If you refer back to the same key pages time and again and your client hasn’t already bookmarked these (contents, part titles, chapter first page, bibliography, index etc.), it’s easy to do it yourself and will save you time. Use Ctrl B to open the bookmark function in Acrobat, PDF-XChange or PDF-XChange Viewer and name your page.
​
​​6. Use a snipping tool to make your own quickie stamps
If you are constantly using a particular combination of mark-up symbols in a piece of work (e.g. you have to change A to Å many times), you can make your own quickie stamp using a snipping tool. Windows supplies this, but if your operating system doesn’t there are plenty of free alternatives online. Pin it to the task bar at the bottom of your screen to access it quickly.

In the case given above, you would use the typewriter to print Å on your PDF, followed by the replace-slash stamp. Use your snipping tool to draw round both marks and save. Then import your new stamp into your palette. Now you only have to make one click, not two, in order to make the margin mark.
snipping tool
Related articles
To access the stamps files, see the article Free Downloadable Proofreading Stamps. For a more detailed look at using stamps for onscreen work, go to PDF Editing: Making the Most of the Stamps Tool. For installation instructions, click here.

Anything to share?
Do you have any tips to share for more efficient onscreen work, such as favourite keyboard shortcuts or using function keys? Please share them with us in the Comments section below so that we can all improve our onscreen working experience.
Louise Harnby is a line editor, copyeditor and proofreader who specializes in working with crime, mystery, suspense and thriller writers.

She is an Advanced Professional Member of the Chartered Institute of Editing and Proofreading (CIEP), a member of ACES, a Partner Member of The Alliance of Independent Authors (ALLi), and co-hosts The Editing Podcast.

FIND OUT MORE
> Get in touch: Louise Harnby | Fiction Editor & Proofreader
> Connect: Twitter at @LouiseHarnby, Facebook and LinkedIn
> Learn: Books and courses
> ​Discover: Resources for authors and editors
12 Comments

Free Downloadable PDF Proofreading Stamps

8/1/2012

59 Comments

 
Want to annotate a PDF with digital proofreading marks? Below are my free proofreading stamps files in red, blue and black. ​They conform to British Standard BS 5261-2 (2005).
PDF proofreading stamps
Picture
You will not have to resize these stamps – I've designed them to work with the font size that most book files use. Simply upload them into your PDF editor and you’re ready to go!

  • For installation instructions, see my article Installation Instructions for Proofreading Stamps.
  • If you wish to create your own stamps, or you want to see samples of what a marked-up PDF looks like, see my article PDF Editing – Making the Most of the Stamps Tool.
  • Check the Stamps archive to see other articles about using stamps with free PDF viewers/readers.
  • For a list of American proofreading stamps, visit KOK Edit’s Copyeditors' Knowledge Base and scroll down to "PDF editing stamps". 


​What users are saying ...

Stamps
A sample of just a few of my proofreading stamps
  • This looks brilliant! I wish I had had these for my last job.
  • These are fantastic! I'd never thought of using stamps in this way until I saw how you did it.
  • Thanks, these look great! They would have been useful for the job I've just finished.
  • This is an excellent solution.
  • Having followed Louise's clear instructions, these proofreading stamps are ingenious!
  • I am really delighted with this set because they are the perfect size for most of my work without any tweaking.

Click on the buttons below to download the PDFs files containing the stamps, then head over to the installation instructions. 


​New stamps with transparent backgrounds

UPDATE 5 JUNE 2020. All the stamps now have transparent backgrounds, which means they can be placed on top of greyscale and colour pages and boxes, and squeezed between text without blocking out the elements.
RED STAMPS
BLUE STAMPS
BLACK STAMPS

Learn about how to mark up PDFs like a pro

Want to learn how to mark up page proofs with my stamps and other markup tools? Check out Denise Cowle’s course, Proofreading: How to Mark Up PDF Page Proofs.
Picture
Louise Harnby is a line editor, copyeditor and proofreader who specializes in working with crime, mystery, suspense and thriller writers.

She is an Advanced Professional Member of the Chartered Institute of Editing and Proofreading (CIEP), a member of ACES, a Partner Member of The Alliance of Independent Authors (ALLi), and co-hosts The Editing Podcast.

  • Get in touch: Louise Harnby | Fiction Editor & Proofreader
  • Connect: Twitter at @LouiseHarnby, Facebook and LinkedIn
  • Learn: Books and courses
  • Discover: Resources for authors and editors
59 Comments

Installation instructions for proofreading stamps

8/1/2012

72 Comments

 
This article contains installation instructions for most versions of Acrobat and PDF-XChange. Scroll down the page to find the set appropriate for the platform you're working with. 
PDF proofreading stamps
Picture
NOTE: Rest assured that you don't need advanced technical knowledge to install the stamps. In fact, you don't need any technical knowledge at all! You simply need to be able to follow the instructions as they are given. 

Use the right instructions!

I've updated this post several times since it was first written in 2012 as new versions of software have been released.

P
lease follow my instructions to the letter. I've provided installation support to a number of users in recent years. On every occasion, problems occurred for one of the following reasons:
​
  • the user hadn't actually followed the instructions at all but had carried out what he or she thought were the logical steps
  • the user had only partially implemented the instructions (perhaps skimming the written instructions or video tutorial, or paying attention only to the early steps in the process) and then made incorrect assumptions about the later steps
  • the user tried to install the stamps using the wrong set of instructions (e.g. a set that relates to a different PDF editor or version thereof). Scroll down the article to find the relevant set.

Again, please ensure that you follow the instructions step by step before you contact me to report that you're having problems. If you do need to contact me, please tell me the following:
 
  • Which operating system you’re using
  • Which PDF editor you’re using
  • Which instructions you followed from those offered in this article
  • Where you came unstuck
NOTE: The first step is to DOWNLOAD THE STAMPS, whichever set of instructions your are using.
DOWNLOAD STAMPS


​PDF-XChange Editor 8.0

Instructions correct as of 4 January 2020 and apply to Windows 10, Office 365
  1. Download the stamps collection (red, blue and black are available) and save anywhere you like. 
  2. Open PDF-Xchange Editor.
  3. Type “stamp” into the search box at the top of the screen and select STAMPS PALETTE from the drop-down menu.
  4. Select ADD NEW.
  5. Select ADD NEW STAMP FROM FILE. This will open up a new window.
  6. Now select the PDF of the stamps collection you just downloaded (e.g. red).
  7. To add the collection, scroll down and click on the ADD NEW button located on the right of the Target Collection box).
  8. Give the collection a name (e.g. Red Stamps).
  9. Click OK.
  10. Now explore the Stamps Palette window above – your new collection should be visible. Use ZOOM IN and ZOOM OUT buttons to get the layout you want.
  11. Right-click on an individual stamp to rename it. I recommend using numbers (read this article on reorganizing your stamps palette).

​PDF-XChange Editor 6.0

​My colleague Helen Mortimor has kindly provided the following installation instructions for use with Editor 6.0:
  1. Download the stamps Open Roundup: PDF Proofreading Stamps (quick-access links) to your This PC > Documents folder. Make a note of which file is which colour.
  2. Download Editor 6.0 here.
  3. Open any PDF.
  4. Go into Tools > Comment and Markup Tools > Stamp Tool > Stamps Palette.
  5. Click on the 'Add New Stamp from File' icon, which looks like an open folder.
  6. Click on the folder icon to the right of the 'Name' field and select a stamp folder from your documents folder.
  7. Click on 'All pages'.
  8. Give the stamps a title in ‘New title’ (I think this is where you could select a page at a time and re-name each stamp with numbers).
  9. Click the 'Add New' button at bottom right, and give the new collection a name (e.g. 'Red Proofreading Stamps').
  10. Click OK.
  11. Your stamps should install. Repeat from Step 3 for the rest of the collection.

PDF-XChange Editor 3.0

​My colleague Steve Hammatt has kindly provided the following installation instructions for use with Editor 3.0:
  1. Go into Tools > Comment and Markup Tools > Stamps Palette.
  2. Click on the 'Add New Stamp from File' icon, which looks like an open folder.
  3. Click on the folder icon to the right of the 'Name' field and select any PDF from your computer.
  4. Click the 'Add New' button at bottom right, and give the new collection a name (e.g. 'Red Proofreading Stamps'). Doing this will have automatically created the folder you will need. In Windows XP this should be: C:\Documents and Settings\<user>\Application Data\Tracker Software\PDFXEditor\3.0\Stamps. In Windows 8, 7 and Vista it should be: C:\Users\<user>\AppData\Roaming\Tracker Software\PDFXEditor\3.0\Stamps.
  5. Navigate to that folder; delete the file to leave the folder empty.
  6. a) Open Roundup: PDF Proofreading Stamps (quick-access links). b) Scroll through and click on, and open, the version of the XChange stamps file you want. (Don't worry if you can only see one stamp on the front page. This is as it should be.) Save the downloaded file in the folder you have just created.  
  7. Close Editor and re-open it. You should see a full set of stamps available for use in the Stamps Palette.
  8. For each separate file you choose (different colour options or additional sets of stamps) you will need to repeat Step 6b.

PDF-XChange Pro and the free Viewer 2.0

​One of the main benefits of using PDF-XChange Viewer is that you can import all my stamps in one go. Video tutorial. For those of you who'd like to watch a tutorial of the steps outlined below, here's a video demonstration in which I talk you through the process, step by step, while actually downloading a set of stamps onto my own computer.

NB: This is the squeaky-chair edit, a limited-edition version created especially to provide the feel-good factor for editorial freelancers whose home offices benefit from well-oiled swivel-seating arrangements!

 Written instructions 
  1. Download PDF-XChange and install it on your computer.
  2. Create a special folder for your stamps. To do this:
    a) Open PDF-XChange, select Tools from the top menu, then Comment And Markup Tools, then Show Stamps Palette.
    b) Click on 'New ...' to create a New Collection.
    c) Then click on 'From PDF ...' and use this to copy any PDF you like from anywhere you like in your computer.
    You should now see a New Collection with that PDF in it. Doing this will have automatically created the folder you will need. In Windows XP this should be: C:\Documents and Settings\<user>\Application Data\Tracker Software\PDF- XChange Viewer\2.0\Stamps. In Windows 10, 8, 7 and Vista it should be: C:\Users\<user>\AppData\Roaming\Tracker Software\PDF-XChange  Viewer\2.0\Stamps.
  3. Navigate to that folder,* select the copied PDF (it will have a weird number – don't worry) and delete it, leaving the folder empty. 
  4. a) Open Roundup: PDF Proofreading Stamps (quick-access links).
    b) Scroll through and click on, and open, the version of the XChange stamps file you want. (Don't worry if you can only see one stamp on the front page. This is as it should be.) Save the downloaded file in the folder you have just created.  
  5. Close PDF-XChange and re-open it. You should see a full set of stamps available for use in the Stamps Palette.
  6. For each separate file you choose (different colour options or additional sets of stamps) you will need to repeat Step 4b.

* Can't find the AppData folder?
If you can't find the folder, the most likely reason is that the Application Data (or AppData) folder (a hidden folder) is invisible on your computer. 
  • To show it in Windows XP, go to Start, Control Panel, Folder Options, View, Show Hidden files and folders. 
  • For Windows 7 and Vista, go to the Windows icon in the bottom left-hand corner of your screen and search for 'show hidden files and folders'. Click on this and look down for the Hidden Files and Folders icon. Then check the button labelled 'Show hidden files, folders and drives'. Select OK. Now you should be able to save the XChange files in the correct place, enabling them to appear in the palette.
  • For Windows 8, follow the instructions in this tutorial from bleepingcomputer.com: How to see hidden files in Windows 8.

Acrobat 9 (Standard and the free Reader)

  1. Open any PDF.
  2. Select the stamp icon from the Comment and Markup Toolbar (this ribbon should show up at the top of the page) and click on the drop-down menu.
  3. Select Create Custom Stamp.
  4. Click on the Browse button and select the location of the PDF stamps file (e.g. Red Stamps).
  5. Each stamp will appear on a separate page. Use the scroll bar to select the stamp you wish to upload.   
  6. Click Import.
  7. Click OK.

The first time you do this you’ll have to write in a category (e.g. Red Stamps). When you import a second stamp you can simply select this option. You can also name the stamp if you wish but I didn’t bother, choosing instead to leave the default New Stamp.

When you have uploaded all your stamps and are ready to start marking up your document, select Show Stamps Palette from the stamp icon in the ribbon menu and a box will appear. If you have different categories (e.g. Blue Stamps) you can select these from here.

Acrobat <9 (Standard and the free Reader)

  1. Open any PDF (If the stamp icon isn't on display in the toolbar select the Commenting Toolbar by choosing View, Toolbars, Commenting from the menu).
  2. Go to the stamp icon on the top ribbon menu and click on the drop-down menu.
  3. Select Create Custom Stamp.
  4. Click on the Select button and then the Browse button to select the location of the PDF stamps file (e.g. Red Stamps). 
  5. Each stamp should appear on a separate page. Use the scroll bar to select the stamp you wish to create.
  6. Click OK.

The first time you do this you’ll have to type in a category (e.g. Red Stamps). When you import a second stamp you can simply select this option. You can also name the stamp.

When you have downloaded all your stamps and are ready to start marking up your document, select the drop-down menu from the stamp icon in the ribbon menu, and the categories you have created will be listed along with the defaults. You can then select the stamp from the category you require.

Acrobat X

​My colleague Jenny Macgregor has very kindly put together some instructions for downloading my proofreading stamps into Acrobat X. Here's her advice...
  1. Download the stamps from this website, whichever colours you use, and save somewhere convenient. At this point I recommend making a list on paper of the number of each stamp, and what it is (it varies between colours). This is worth the few minutes it takes, and is invaluable later on in the process.
  2. Open the PDF you are proofreading. In the bar across the top, click on Comment, as you would normally do to start marking up, then open Annotations, if it is not already open.
  3. Click on the stamp icon (it takes a few seconds for a grey box to open), then click on Custom Stamps and, from the box which pops up next to it, Create Custom Stamps.
  4. The Select Image for Custom Stamp window will open with a browse facility. Use that to find the stamps you have saved earlier, starting with whichever colour you are likely to use most.
  5. At this stage you will need the paper you have marked all the symbols on: use it to choose which you are most likely to need, and then use the number and the slider on the right-hand side of the box to locate the first symbol you want to install. You need the number because the images in the box are too small to distinguish easily. Click OK.
  6. A new box opens; in the category box, type in the colour, i.e. red stamps/black stamps/blue stamps. I haven’t found any benefit in giving a name to each stamp, so just leave it as New Stamp. Then click OK. The box disappears.
  7. Repeat this with any other symbols you are certain to need, and any other colours. After the first one in each category, the category name (red stamps, etc.)  appears in a drop-down box to be selected, which saves time.
  8. Once you start the proofread, if you want to add a stamp to the PDF, click on the stamp symbol, and the grey box opens as before, but now it will have the categories of stamps you have installed, i.e. red stamps, black stamps, etc. Click on the colour you want to use and another grey box will open with the symbols in it. Click on the symbol you want to use, and it will ‘ghost’ onto the PDF you are proofing. Move it to where you want it and then click, which will attach it to the PDF. That’s it!
  9. The last stamp you used can be added to/removed from a favourites list – favourites appear in the first grey box to open, and can be selected from it, which saves some time.
  10. At any time during the proofread, if you find you need a stamp you haven’t already installed, repeat steps 3–6, using your paper list to find the appropriate stamp number.
  11. To keep the stamps palette open, click on the stamp symbol, and when the grey box opens click on Show Stamps Palette.

Adobe Acrobat Reader DC

Instructions correct as of 5 December 2021
  1. Open any PDF.
  2. Click on the Tools tab in the ribbon.
  3. Click on the Stamps icon. The Custom Stamps icon will now appear in the ribbon.
  4. Select Create from the Custom Stamps drop-down menu.
  5. Click on the Browse button to select the location of the PDF stamps file (e.g. Red Stamps). 
  6. Each stamp should appear on a separate page. Use the scroll bar to select the stamp you wish to create.
  7. Fill in the Category (e.g. Red stamps). You can re-use this for the second stamp you add.
  8. Give the stamp a name (e.g. '1' or 'delete').
  9. Click on OK.
  10. Use the Stamps Palette icon in the ribbon to access your symbols (remember to select the relevant category).

Tips

Here are a few tips to bear in mind when using stamps. Search the Stamps archive for other useful articles and resources.
  • Remember to keep your stamps palette open when you are working in both Acrobat or XChange; it will save you time when selecting each stamp you want to use.
  • In XChange you can minimize the size of the symbols as they appear in the palette. This enables you to see a greater number of stamps while you are working without having to scroll up and down the palette (see the highlighted circle on the screenshot below).
  • In XChange, number similar stamps sequentially so that they appear in a logical order. This will make it easier to find the stamp you need, particularly if each palette contains a lot of symbols (see screenshot below).
  • It's useful to keep your palettes of different-coloured stamps separate so that the palettes don't become overly cluttered. Again, this will enable you to locate the stamp you need more efficiently. 
Stamps palette
PDF-XChange Viewer: screenshot of minimizing tool and stamps palette.
Louise Harnby is a line editor, copyeditor and proofreader who specializes in working with crime, mystery, suspense and thriller writers.

She is an Advanced Professional Member of the Chartered Institute of Editing and Proofreading (CIEP), a member of ACES, a Partner Member of The Alliance of Independent Authors (ALLi), and co-hosts The Editing Podcast.

  • Get in touch: Louise Harnby | Fiction Editor & Proofreader
  • Connect: Twitter at @LouiseHarnby, Facebook and LinkedIn
  • Learn: Books and courses
  • Discover: Resources for authors and editors
72 Comments

PDF Editing – Making the Most of the Stamps Tool

1/1/2012

69 Comments

 
Tips for proofreading PDFs
These days, it's not uncommon to be asked to edit and proofread onscreen. If you're editing in Word, all well and good; you can amend the text directly. If you're tackling designed page proofs, you'll probably be working on a PDF. 
PDF proofreading and editing tools
Picture
The PDF editor's onboard markup tool is one option. Using custom stamps is another, and that's what I'll be exploring today.

​
Why use customized stamps?
Even in the standard versions of most PDF editors (as opposed to their freely available readers), the tools can be restrictive. For me, punctuation errors are a major problem – I feel that insertion and deletion tools for punctuation marks (and even single letters) are often ambiguous, with the highlight or strike-out line appearing to ‘spread’ further on the page than would be the case on a paper mark-up.

About the stamps …
I created a set of customized stamps that can be imported into my PDF editing software (I have both PDF-XChange and Acrobat).

The stamps are based on the current BSI proofreading symbols and once downloaded can be imprinted onto the page, giving the proof the appearance of its paper cousin.

No more clunky comments and digital sticky notes, and say goodbye to ambiguous highlighting. Now you can keep the comment boxes in reserve for queries to your author or in-house editor.

​The following is a sample of just a few of my stamps.
Sample of proofreading stamps
Which software is compatible?
I’ve tested the stamps on Adobe Acrobat (standard version) and PDF-XChange and can confirm that they can be imported (other PDF editors that have stamping functions, such as Foxit and PDFill, may also be compatible, though I’ve yet to verify this – comments welcome!).

What if you only have a free reader/viewer?
No problem – you don't need to have the full paid-for versions of Acrobat or XChange in order to use the stamps.

You can use your free Acrobat Reader as long as you ask the person who has created the PDF to 'enable comments'.

With PDF XChange Viewer, you don't even need to worry about enabling comments – the stamps will work on your PDF as soon as you have uploaded them. An additional benefit of Viewer is that you can import all the stamps in one go.

Can you use the stamps with a Mac?
One of the first questions asked after I posted this article was whether the stamps files would work for Mac users.

I work on a PC but since the stamps files are PDFs it doesn't make any difference whether you're working on a PC or a Mac. Rather, the most important thing is that you have the Mac version of your PDF editor, e.g. Acrobat for Mac.

What does the marked-up proof look like?
I’ve been delighted with the results, as have many of my clients. The marked-up proofs using the stamps are much clearer to read, as the two examples show.

There are only four amendments in Example 1, the comment-box version. Imagine how much time it would have taken to select the text, choose the relevant option from the Text Edits menu and write the instruction to the typesetter if all the amendments in Example 2 had been made without using stamps.

​And if the typesetter opened up all these comments boxes, what a mess it would have been.
PDF markup: comment boxes
Example 1: Using the comment box only.
PDF markup: stamps
Example 2: Using customized stamps.
Creating stamps
Creating the stamps is the fiddly part and the most time-consuming.

Getting the correct size, so that you don’t have to resize each stamp when you’re working on a set of proofs, takes a little time and, of course, creating each individual stamp can seem painstaking.

However, the job only has to be done once and I’ve been using mine for a couple of years now. It’s worth spending some time playing around with your designs early on in order to make life easier for yourself later.

I’ve created stamps in red, blue and black because my clients have different requirements.

I used Publisher to create the stamps, but you could use any software with a drawing tool. Set up each stamp on a separate page. Once you’ve drawn all your stamps convert the file into a PDF.

Want to use the stamps that I've already created?
I’m happy to share with colleagues who have the same commitment as I do to improving skills and supporting our industry’s professional standards.

To access your copies of my stamps, click here – there's no charge. If you're using PDF-XChange (I'd recommend you do so), make sure you select the stamps labelled "XChange".

Note: Please note that my stamps are based on proofreading symbols as defined by BS 5261-2 (2005). If you are working outside the UK, not all of the symbols may conform to those you are used to working with.

For a set of stamps that use US proofreading marks, take a look at KOK Edit's excellent Copyeditors' Knowledge Base – scroll down to 'PDF'.
 

Importing customized stamps
For installation instructions, and some useful tips, see my article Installation Instructions for Proofreading Stamps.

Future updates
Periodically, I create new or modified stamps to deal with an amendment that's cropping up frequently in a job I'm working on. I'll place these additions in the Stamps archive located on the blog sidebar. Drop by now and then to see if there's anything new that's of use to you. I'll name the post with a description of the stamp and I'll include a picture and downloadable file in case you want to add it.

Which PDF editor do you use?
Do you use customized stamps in PDF editors/readers other than Acrobat and PDF-XChange? Please let us know in the Comments section so that others can see which software is compatible.

UPDATE:
  • For installation instructions see my article Installation Instructions for Proofreading Stamps.
  • For quick-access links to all of the PDF proofreading stamps files, including the original full set updated in February 2013, see Roundup: PDF Proofreading Stamps (quick-access links).
  • For a list of American proofreading stamps visit KOK Edit’s Copyeditors' Knowledge Base and scroll down to "PDF editing stamps".
Louise Harnby is a line editor, copyeditor and proofreader who specializes in working with crime, mystery, suspense and thriller writers.

She is an Advanced Professional Member of the Chartered Institute of Editing and Proofreading (CIEP), a member of ACES, a Partner Member of The Alliance of Independent Authors (ALLi), and co-hosts The Editing Podcast.

Visit her business website at Louise Harnby | Fiction Editor & Proofreader, say hello on Twitter at @LouiseHarnby, connect via Facebook and LinkedIn, and check out her books and courses.
69 Comments

    BLOG ALERTS

    If you'd like me to email you when a new blog post is available, sign up for blog alerts!
    Proofreading stamps
    ALERT ME!

    WHAT DO YOU NEED?

    • Training courses
    • ​Books and guides
    • Editor resources
    • Author resources
    • ​Monthly newsletter
    Picture
    SIGN ME UP

    PDF MARKUP

    Proofreading stamps

    AUTHOR RESOURCES

    Proofreading stamps

    EDITOR RESOURCES

    Proofreading stamps

    BOOKS FOR EDITORS AND WRITERS

    Picture
    Picture
    Picture
    Picture
    MORE BOOKS

    TRAINING COURSES FOR EDITORS

    Picture
    Picture
    Picture
    Blogging for Business Growth course
    MORE COURSES

    TESTIMONIALS


    Dare Rogers