|
In this article, I offer 12 tips on how to make your book file editor-ready.
Interior book design is something that should be carried out after your book’s been edited, not before.
If you’re creating a printed book, post-design page proofs are perfect for the proofreader because they can check not only your spelling, punctuation and grammar but also the layout. Page proofs are either hard-copy or PDF versions of the book that are laid out exactly as they will appear in the final printed version. You and your proofreader will be looking at what the reader would see if they were to walk into a bookshop, pull the title off the shelf and browse through the pages … almost. The proofreader’s job is to ensure that any final errors and layout problems have been attended to before the book is printed. For a comprehensive overview of what needs to be attended to when proofreading designed page proofs, read this (available free when you sign up to The Editorial Letter): Proofreading checklist: How to check page proofs like a professional.
With copyediting (and proofreading raw-text files for digital books), it’s a different story ...
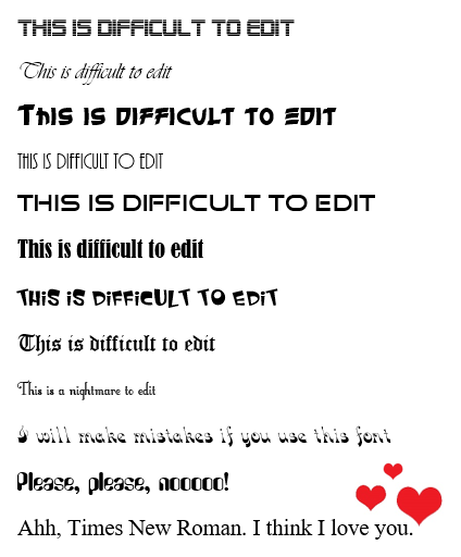
Working with raw-text files If you are asking a professional editor to work on the raw text of your book, follow these 12 recommendations to ensure that the file is editor-friendly. The good news is this: it means less work for you, not more, because you’re not having to design anything … not yet, anyway. 1. File format Most professional fiction editors work in Microsoft Word. That’s because, despite the odd glitch, it’s still the best word-processing software on the planet. It has a range of excellent onboard tools that help your editor style the various elements of your text consistently, and quickly locate potential problems that might need fixing. Word is compatible with a host of macros that complement the editor’s brain and eye. That means they can add an extra level of quality-control to the edit efficiently. Even if you’ve written your book in a different program – for example, Scrivener, Google Docs or Apple Pages – place the text in a Word file before you send it to your editor. You’ll get a better-quality book edit, I promise. 2. Number of files Unless you’ve agreed with your book editor to work serially – i.e. on a chapter-by-chapter basis – create a single master file that contains the full text of your novel. If you send them 75 separate chapters, all they’ll do is combine them into one file … after they’ve finished weeping with frustration. Editors want to ensure that your book is consistent – that Kathyrn doesn’t become Katherine, Catherine or Cathryn. There are Word plug-ins that can help them identify problems like this efficiently but they’re only effective if the editor is working with a single file. The same applies to ensuring that the various elements of your text are formatted consistently. For example, it’s conventional for the first paragraph in a chapter or section to be full-out (not indented). Your editor can use Word’s styles palette to define the appearance of a first paragraph. Once the style has been set, it’s a case of applying it to every relevant paragraph in the file. If they don’t have a master file to work with, they’ll have to create a new style for each one of your 75 chapters or import that style for the same. Fiction editors love master files, and they will love you if that’s what you provide. 3. Fonts You might have decided to use an unconventional font for your book interior. You’re perfectly entitled to use any font you choose ... just spare a thought for your editor’s eyes. When it comes to the editing stage, stick to something like Times New Roman, size 14. It’s a serif font, which means it’s easy on the eye. The less your editor struggles to read the text, the better the quality of their work.
4. Colours
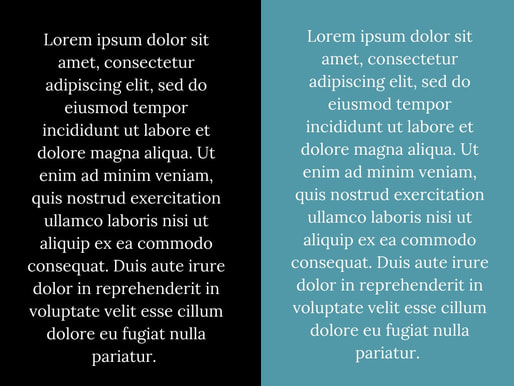
I recommend you use black text on a white page. Again, it’s about readability. The white text on the coloured blocks below certainly stands out, and the contrast is visually appealing, but for editing purposes it’s a challenge.
A couple of years ago, I was asked to copyedit a fabulous book for an indie author. The pages were black, the text pink. The first thing I asked him – no, begged him – was for permission to change the file’s appearance to something more conventional.
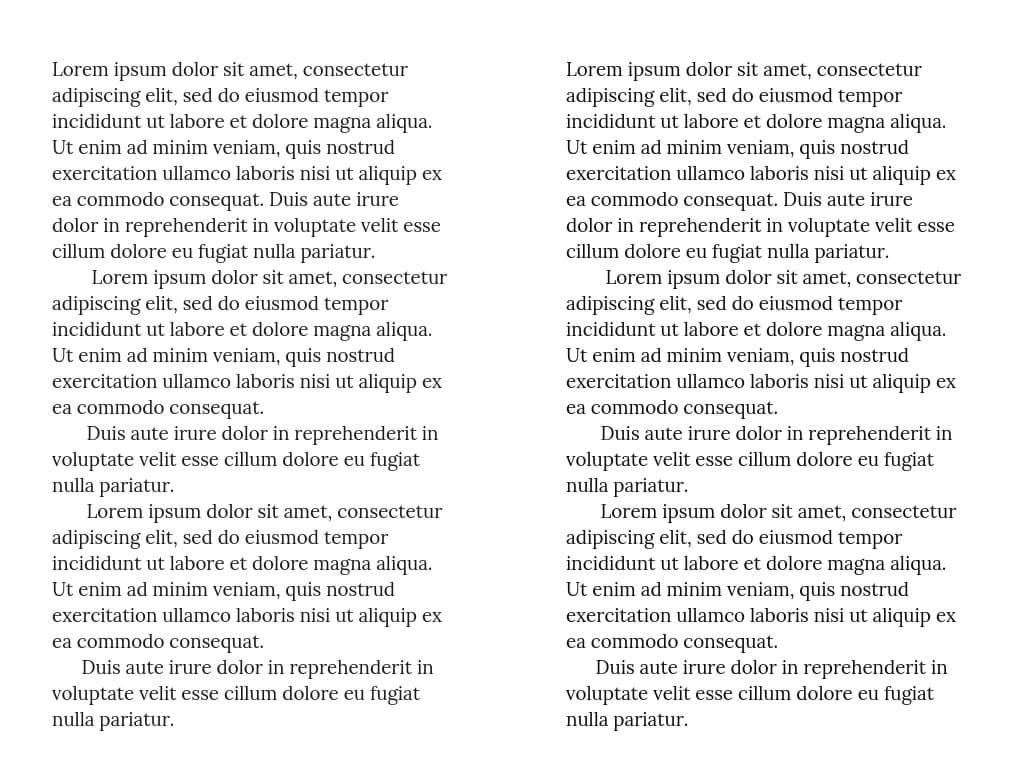
He agreed to save the quirky colourway for the design stage and I was immensely grateful. So was he. I’d have had to increase my price because I would have edited more slowly. 5. Paragraphs Open any novel on your bookshelf and it’s likely you’ll see a text layout something like this:
Those indented paragraphs are not made using the tab key. Instead, use Word’s ribbon to create proper indents.
To find out how to create a body-text style with proper indents, watch this video tutorial: Self-editing your fiction in Word: How to use styles.
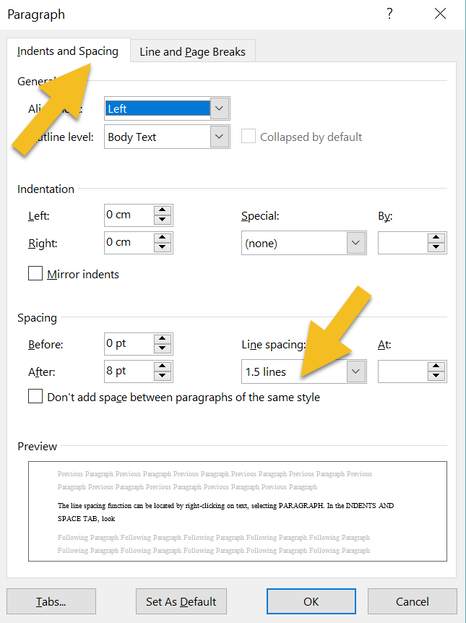
6. Spacing At line and copyediting stage, don’t worry about how many pages your text covers. Instead, give your editor a file with the lines spaced so that the text is easy to read. Setting the line spacing at 1.25 or 1.5 works well for a font size of 12 or 14. The line spacing function can be located by right-clicking on text and selecting PARAGRAPH. A window will open. Make sure you’re in the INDENTS AND SPACING tab. Then amend the LINE SPACING field.
7. Chapter headings
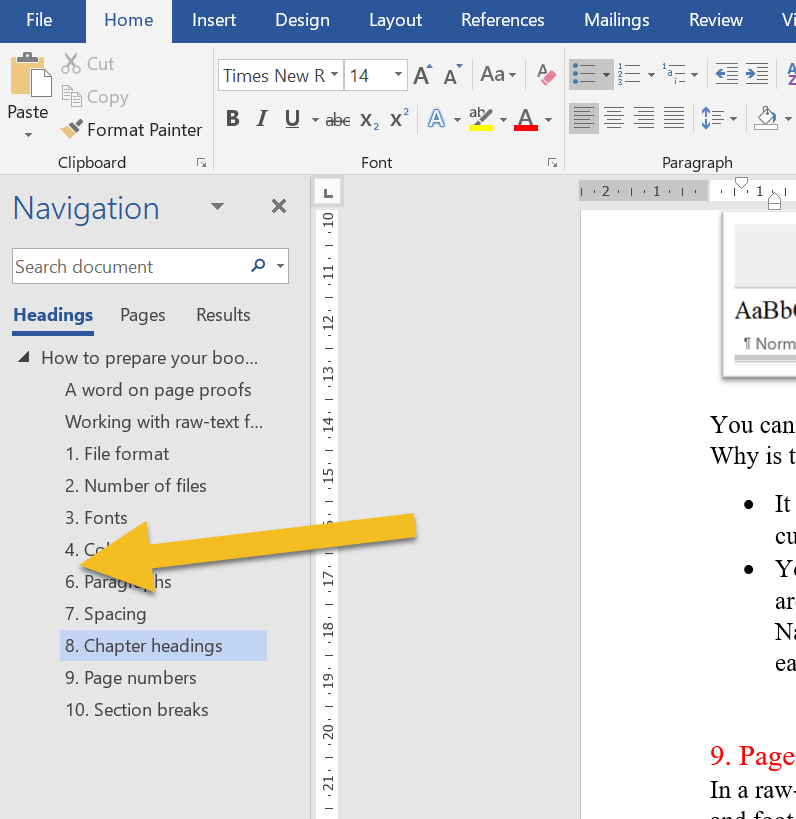
Your editor will adore you if you assign your chapter headings with one of Word’s heading styles:
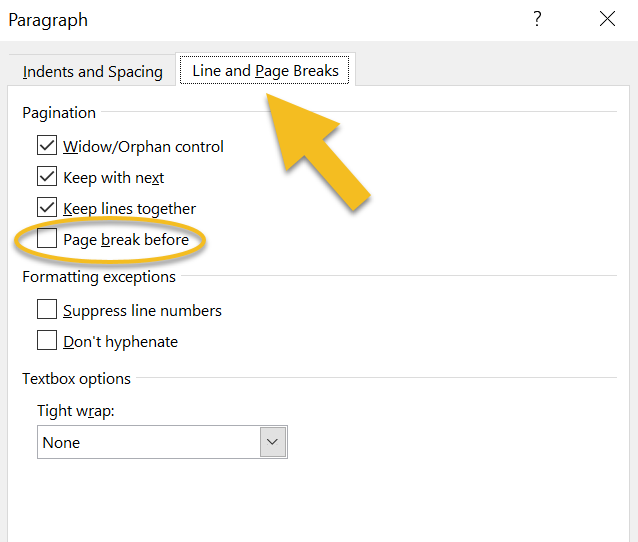
You can even modify the style so that it automatically starts on a fresh page.
Right-click on the heading style, select MODIFY, then FORMAT, then PARAGRAPH. A window will open. Make sure you’re in the LINE AND PAGE BREAKS tab. Check the PAGE BREAK BEFORE box.
Why is this useful?
8. Page numbers
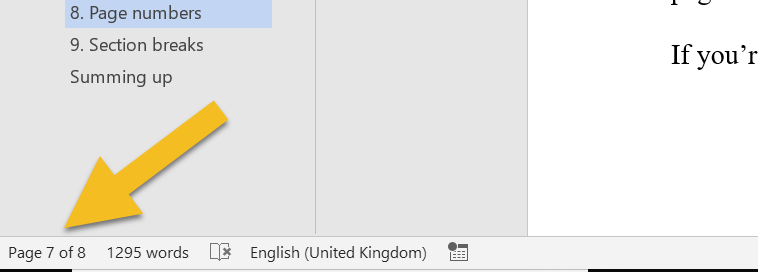
In a raw-text work of fiction, there’s no need for page numbers or other headers and footers. Word records the page number in the bottom-left-hand corner of the screen of a PC, and that’s what an editor will refer to if they need to direct your attention to a specific page.
If you plan to upload a later version of your file for ebook creation, your page numbers will need to be removed anyway.
If you’re printing, save the page numbering for design stage. 9. Section breaks I recommend introducing three asterisks (***) to indicate a section break. You can change them at design stage of course, but they’re handy at editing stage because your editor can see that you intend for there to be a section break. Why not just have a line space? Because sometimes a writer will accidentally hit the return button twice. Your editor will have to spend time working out whether the break is intended rather than focusing on the flow of your text and any errors that need correcting. 10. Pictures/images If your editor needs to check copy against images and their captions, consider placing these in a separate file. Images, especially high-resolution ones, will increase the size of your book file massively, and slow down refreshing when the editor saves. And your editor will save once every few seconds. Sounds bonkers, doesn't it? But the editor who doesn't save regularly is the editor who finds they've lost a precious half-hour's worth of editing because there was a power cut, or a hurricane, or the oven exploded, or whatever. And when they come to email your edited file full of hi-res images, it will be so huge that they'll have to use an external cloud-based transfer service. The file will take an hour to load (unless they have rubbish broadband speed, in which case it will take two or three hours). They'll do the transfer in the evening so that it doesn't slow them down while they're working, meaning their teenage kid will start moaning and giving them that look because Netflix is buffering or Minecraft won't load, or something equally devastating. Save us, I beg you.
On top of all that, amendments, deletions, and additions to the text will cause your carefully placed images to shift into spaces you didn't intend. Better to leave image placement to interior-design stage. It'll save you and your editor time and tears.
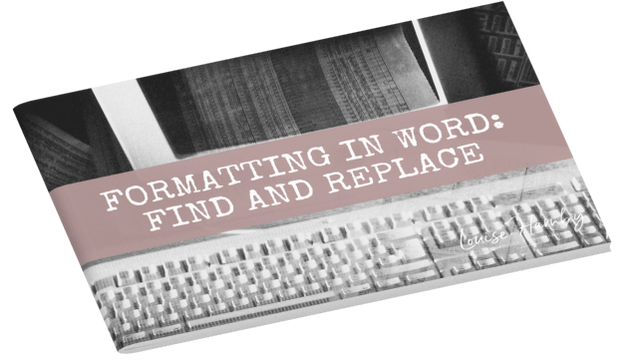
11. Manual tables of contents If you've created a table of contents in a Word file prior to copyediting, there's a good chance that a chunk of your page numbers and some of the chapter titles will be wrong by the time your editor has finished. Of course, you can pay them to fix these too. But that could add an extra hour's work onto your bill. Worse, you'll be wasting your money because when the book's interior is designed, everything will change again. I know this because when I proofread for publishers (and that means I'm working on designed page proofs that have been edited multiple times and designed by a professional interior formatter) the table of contents is always messed up. Sort out your table of contents before you do your final design, not at copyediting stage. It'll save you money, I promise. 12. Manual index I'm adding this one in for non-fiction writers, just in case you're reading. If the page numbers against a table of contents get messed up during copyediting, the damage to an index is nothing short of catastrophic. It's not just the page numbers, but the indexed entries too. Spellings might change, so might compound hyphenation. Some key terms will have been removed or changed. Others will have been added. Indexing should come after proofreading, ideally, but certainly not at copyediting stage. Summing up These are just suggestions, not book law, editing law, any kind of law. However, your editor will love you if you make life easier for them, not because they’re lazy but because they want to focus on making your narrative and dialogue sing rather than formatting text so that it’s readable. There’s absolutely a time and a place for great interior design, but pre-editing stage is not it. Save yourself the bother and keep it simple. For more raw-text tidy-up tips, grab this free booklet: Formatting in Word: Find and Replace.
Fancy watching a video instead? Here’s where to find the free tutorial.
Louise Harnby is a line editor, copyeditor and proofreader who specializes in working with crime, mystery, suspense and thriller writers.
She is an Advanced Professional Member of the Chartered Institute of Editing and Proofreading (CIEP), a member of ACES, a Partner Member of The Alliance of Independent Authors (ALLi), and co-hosts The Editing Podcast. FIND OUT MORE > Get in touch: Louise Harnby | Fiction Editor & Proofreader > Connect: Twitter at @LouiseHarnby, Facebook and LinkedIn > Learn: Books and courses > Discover: Resources for authors and editors
6 Comments
15/10/2018 12:48:39 pm
Excellent post, Louise. I think I will be sharing this a lot!
Reply
Louise Harnby
15/10/2018 01:05:17 pm
Thanks, Jenny!
Reply
Louise Harnby
20/10/2018 06:12:10 pm
Thanks, Bette! Glad it helped!
Reply
Steve O'Gorman
2/9/2019 12:24:57 pm
Thank Goddess someone has had the initiative to put all these tips in one place! I'll be sharing this myself.
Reply
Louise Harnby
2/9/2019 02:48:24 pm
Thank you, Steve! Delighted you think it's useful stuff.
Reply
Leave a Reply. |
BLOG ALERTSIf you'd like me to email you when a new blog post is available, sign up for blog alerts!
TESTIMONIALSDare Rogers'Louise uses her expertise to hone a story until it's razor sharp, while still allowing the author’s voice to remain dominant.'Jeff Carson'I wholeheartedly recommend her services ... Just don’t hire her when I need her.'J B Turner'Sincere thanks for a beautiful and elegant piece of work. First class.'Ayshe Gemedzhy'What makes her stand out and shine is her ability to immerse herself in your story.'Salt Publishing'A million thanks – your mark-up is perfect, as always.'CATEGORIES
All
ARCHIVES
July 2024
|
|
|
|






 RSS Feed


