

|
This outline of the proofreading, copyediting and line-editing process is one way of organizing your editorial workflow rather than bowling straight into a project.
What follows is my process – the steps I take and the order in which I take them. That doesn’t mean it’s THE process! You might prefer to organize yourself differently. Editorial business parameters
My business model might look very different to yours. Here’s what you need to know about me when considering the process I outline below.
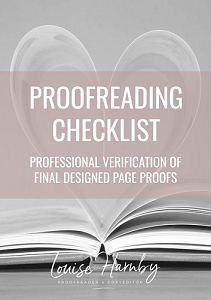
Proofreading designed page proofs
I no longer work on designed page proofs (PDF or hardcopy), but at the point in my career when I did, I used the checklist below.
Step 1. Project legalities
I carry out the project legalities as soon as the author and I have agreed to work together and decided on the project's time frame.
This part of the process protects me and my client, and ensures we have a mutual understanding of the project’s terms and conditions. Step 2. File checking and organization
This work takes place as soon as the book file arrives. The checks ensure I can find the material, and that it’s usable when it’s time for the edit to begin.
WHAT I DO
Step 3. Template creation
This part of the process helps me get organized. I do it before the edit begins.
Step 4. Technical setup
Next up is some technical setup related to Microsoft Word.
WHAT I DO
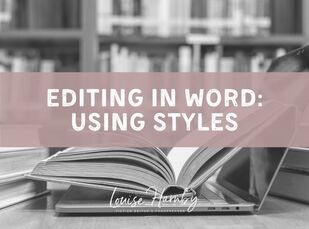
Step 5. Styles
Now it’s time to assess the book file’s styling. Even though an interior formatter might work on the design at a later stage, I want to ensure that the different elements are formatted consistently.
Word’s styles palette is the tool of choice. If I decide to make changes, I can amend the style rather than trawling through the entire book file line by line. If I’m line editing, the author might have done some or all of this work. If I’m proofreading, another editor might have done it. After I’ve set up the styles, I apply them to the book file. Step 6. Chapter sequence check
Now that my chapter headings are styled, I can locate them in Word’s navigation pane and ensure the numbering is correct.
It’s not uncommon for authors to shift chapters around, and that’s where problems slip in.
WHAT I CHECK
Step 7. Front-matter check
I like to cast my eye over the front matter separately from the main edit.
The most exciting part of the project for me is the edit itself, so doing mundane but critical technical checks separately ensures my eye’s on the ball and I'm not making assumptions.
Step 8. Macro run and style-sheet build
Next, I run a selection of pre-edit macros.
Editors use all sorts of different software and tools to complement their eye depending on the issues they need to check, the material they’re working on, and their clients’ needs. The macros I've listed below are not what you must use; they’re just my preferences. I use what I learn to start filling in the project’s style sheet. At this stage I’m making early decisions about spelling, hyphenation, capitalization and proper noun usage, and noting any red flags.
RED FLAGS INCLUDE
Even if I locate problematic language, I’ll not make any decisions about what needs to be done until the contextual edit begins and I can review it within the wider story arc. At this point, I'll just highlight. I’ll also record initial observations that are key to the line edit.
INITIAL OBSERVATIONS
Step 9. The edit
Now it’s time to begin editing. This is the fun bit, what I've been hired for! It's the non-technical part of the job but the most time-consuming.
I work through the book file line by line and edit according to the agreed scope of the project.
Step 10. The part-way PerfectIt check
One third of the way through the line edit, I run PerfectIt again.
That’s because I’ll have made many new style choices that affect, for example, spelling, capitalization and hyphenation, ones that I didn’t pick up during my pre-edit macro run.
BENEFITS
Step 11. The technical tidy-up
When the edit is complete, I carry out another round of checks for layout, consistency, spelling and grammar – a final technical tidy-up to that ensures everything’s spit spot. A little Mary Poppins never hurt anyone!
Step 12. Style sheet check
Next, I review the style sheet to ensure that it’s fit for purpose.
Step 13. Create the editorial report
Now I create my editorial report. I use a detailed template that’s already populated with client-friendly summaries of the theory behind the edits (accessible via my course How to Write the Perfect Fiction Editorial Report).
WHAT THE REPORT INCLUDES
Step 14. Delivery and invoicing
Finally, I prepare the files for my client. It's time to show them what I've done and why I've done it!
WHAT I INCLUDE

After I’ve emailed the files, I issue an invoice for the outstanding fee. Some editors choose to send the files only after all monies have been paid. How you do it is for you to decide. Wrapping up
So that's my way. I hope it'll help you streamline your process if you're unsure where to start.
Just bear this in mind: There's no one best way. We all work differently, and there are multiple ways to edit efficiently and productively.
Louise Harnby is a line editor, copyeditor and proofreader who specializes in working with crime, mystery, suspense and thriller writers.
She is an Advanced Professional Member of the Chartered Institute of Editing and Proofreading (CIEP), a member of ACES, a Partner Member of The Alliance of Independent Authors (ALLi), and co-hosts The Editing Podcast. FIND OUT MORE > Get in touch: Louise Harnby | Fiction Editor & Proofreader > Connect: Twitter at @LouiseHarnby, Facebook and LinkedIn > Learn: Books and courses > Discover: Resources for authors and editors
4 Comments
Tom
5/4/2021 10:45:23 am
Thanks for this. This is a perfect process for me to adopt.
Louise Harnby
7/4/2021 09:37:05 am
Pretty much, Celise, though I don't do a such a detailed report at proofreading stage.
Dover Whitecliff
30/4/2021 01:23:42 pm
Thank you so much. Especially for the tip about the Word styles for chapter checks. That will be a huge time saver! Leave a Reply. |
PDF MARKUP
AUTHOR RESOURCES
EDITOR RESOURCES
TESTIMONIALSDare Rogers'Louise uses her expertise to hone a story until it's razor sharp, while still allowing the author’s voice to remain dominant.'Jeff Carson'I wholeheartedly recommend her services ... Just don’t hire her when I need her.'J B Turner'Sincere thanks for a beautiful and elegant piece of work. First class.'Ayshe Gemedzhy'What makes her stand out and shine is her ability to immerse herself in your story.'Salt Publishing'A million thanks – your mark-up is perfect, as always.'CATEGORIES
All
ARCHIVES
July 2024
|


 RSS Feed
|
|
|
|

|

|
|
|
|

© 2011–2024 Louise Harnby