

|
Are you spending too much time on your novel’s text design? Here’s how to use the Styles function in Microsoft Word to ensure the various elements are formatted consistently.
In this article, I’ll walk you through the following:
What is the Styles tool? The Styles tool allows you to apply design consistency to the various text elements in your book. In a novel, you might want to create different styles for the following:
Microsoft Word has a handy suite of on-board styles, though it’s unlikely they’ll match your specific requirements. Modifying these is still a little quicker than creating fresh styles so take a look at the properties and work out what you’ll retain and what you’ll change. What properties can you influence? You can influence every property of your text when you assign a style to it. However, in a novel, you’ll most likely focus on the following:
How to access the Styles tool There are two ways to access the Styles function onscreen:
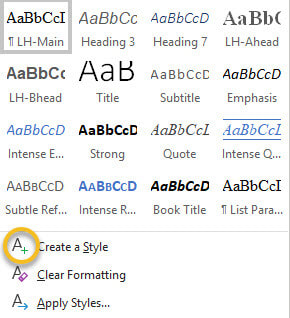
The gallery in the ribbon offers a preview of how the style appears. If I’m working with a lot of different text elements in a document, I find these visual clues useful when I want to locate a style quickly.
On smaller screens, less of the Styles gallery will be visible. To access the previews of all the styles in your gallery, click on the MORE arrow (circled). 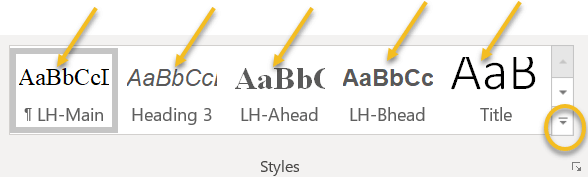
A new window will appear containing the full gallery.

Why you should format with styles
Using styles gives you control over design, consistency and formatting time. Time is money, so when you do the job instead of asking other professionals to do it, your book budgets goes further. Perhaps you can invest a little more time or money on cover design, sales and marketing, or learning how to improve writing craft. Can you format manually? Of course, but you could be making a lot of unnecessary work for yourself. Scenario 1 You complete the writing, drafting, and editing, and get cracking on designing the layout. Now that there are 85,000 words in place, your thriller’s looking more like a textbook thanks to the font you’ve chosen for your main text: Arial 14. A serif font like Times New Roman would be easier on your reader’s eye. The problem is, you can’t select all the text in the file with CTRL A and change it in one fell swoop because that would affect the chapter headings and the emails your transgressor is sending to the police, all of which are formatted differently. Instead, you have to work through the file, locate the main text elements manually, and change the font. If, however, you’ve assigned a style to your main text, you can modify that font property in just a few clicks. The change will automatically change all the main text, and only that element, to your new font. Further down, I’ll show you how. Scenario 2 You’ve written 12 additional paragraphs for your book but they’re in another document. You copy and paste the writing into your book file. Now you have to manually format the new sections so that they match the existing work. If you’ve assigned styles, however, it’s as simple as cut, paste and left-click. Job done. How to create a style There are several ways to create a style in Word:
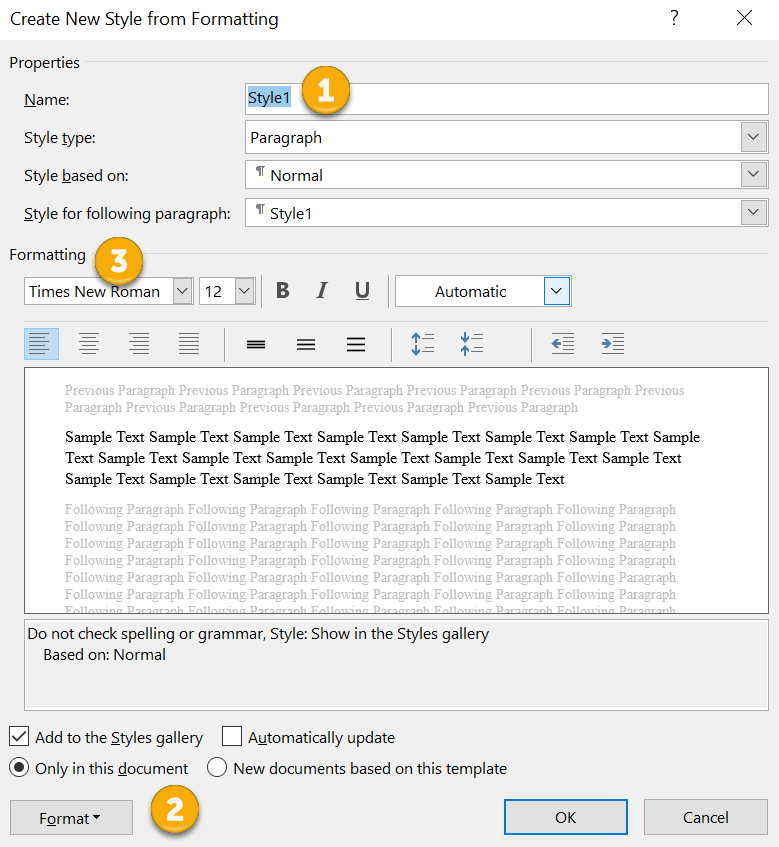
1A. Manual method Open the styles pane and left-click on the A+ button in the bottom-left-hand corner. 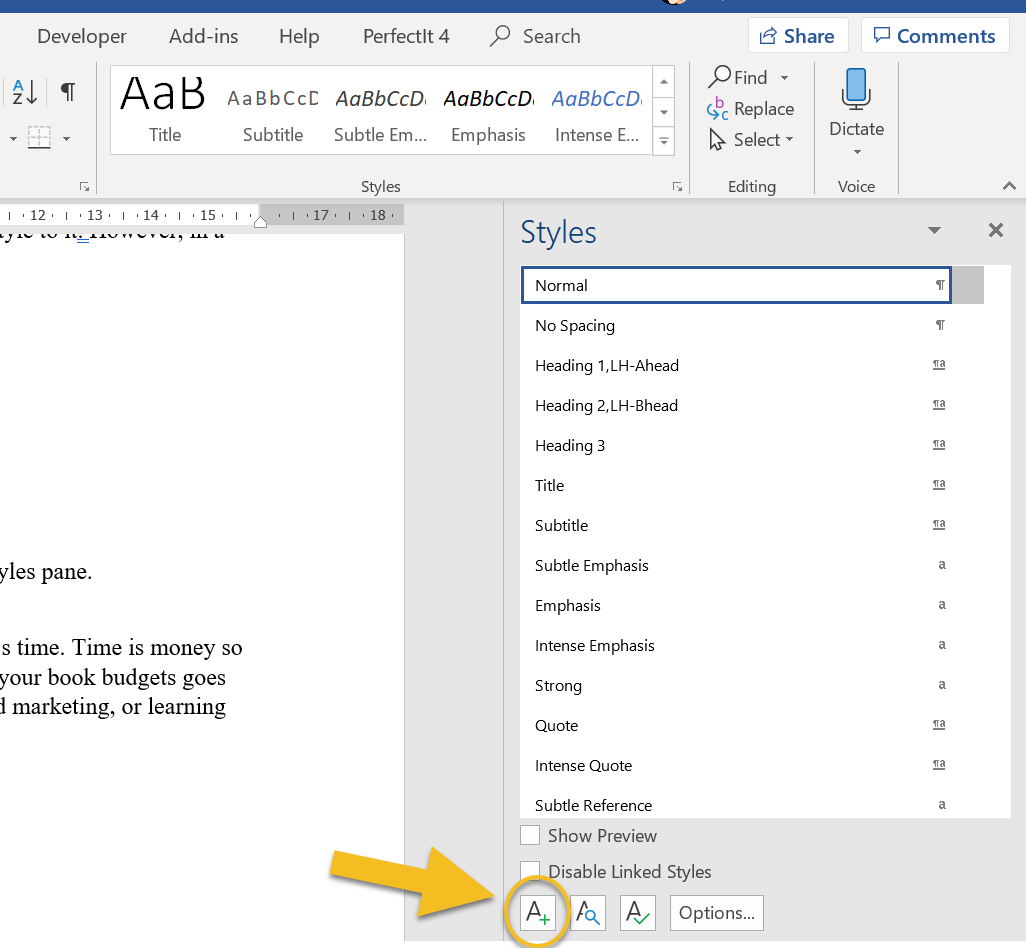
A new window will open (CREATE NEW STYLE FROM FORMATTING). Now you can give your style a name (1) and assign properties to the font, paragraph spacing and page flow (2 and 3).

1B. Manual method B
Alternatively, right-click on a piece of text that’s already formatted according to your preferences. A mini toolbar will appear. Click on the Styles button. 
A new window will appear. Left-click on CREATE A STYLE.
Name your style, modify if you wish, and left-click OK.

2. Updating method
Select a piece of text that’s already formatted according to your preferences. Now head up to the Styles gallery in the ribbon, or the Styles pane, and right-click on an unused style that you’re happy to update. Hover over UPDATE [STYLE] TO MATCH SELECTION, then left-click. 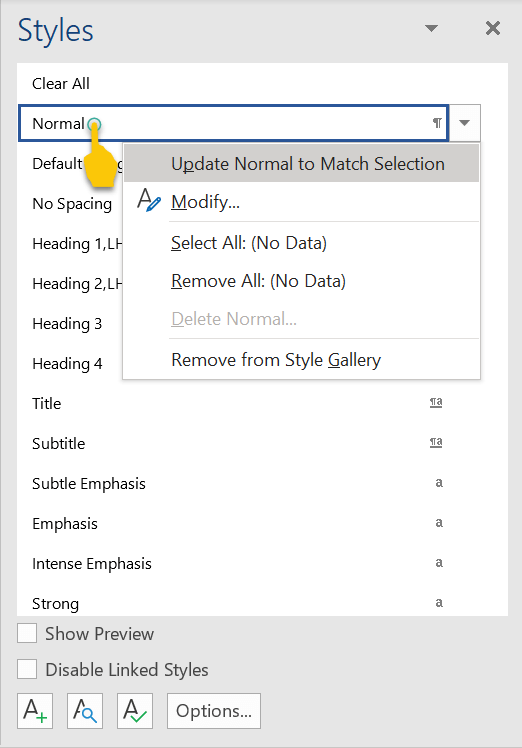
How to modify a style
There are two ways to modify a style in Word:
1. Styles gallery Go to the Styles gallery in the ribbon and right-click on the style you want to modify. 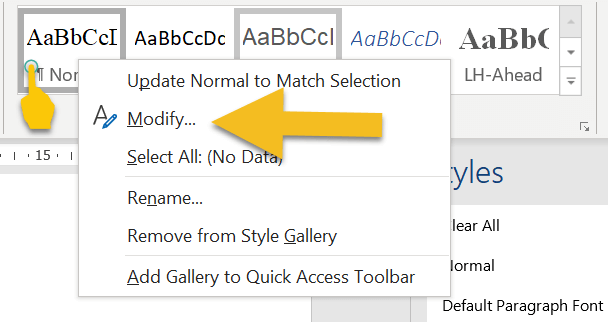
Left-click on MODIFY and amend the properties of your style. Note that this will change every piece of text assigned with that style.
2. Styles pane
Go to the Styles pane on the right-hand side of your screen and right-click on the style you want to modify. 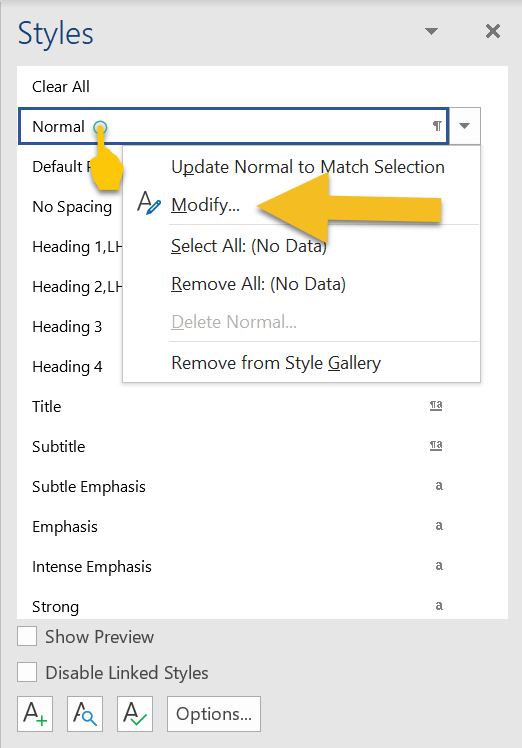
Left-click on MODIFY and amend the properties of your style. Again, bear in mind that this will change every piece of text with that style assigned.
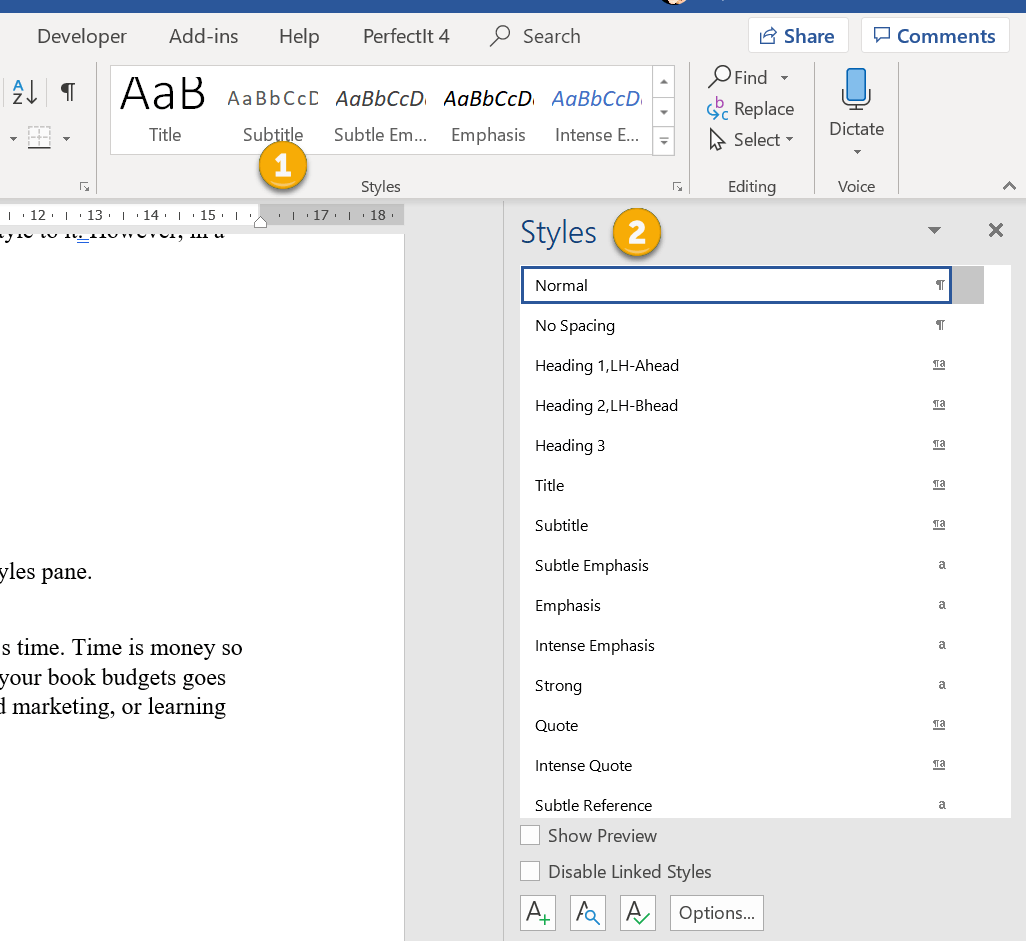
How to assign a style to an element of text If a piece of text isn’t formatted correctly, left-click the cursor on a word or in a paragraph, or select it by double-clicking. Now head up to the Styles gallery in the ribbon, or the Styles pane, and left-click on the preferred style. Your style will be assigned. If you’re working on a smaller screen, you’ll probably find it easier to use the Styles gallery in the ribbon because it takes up less space than the Styles pane. To close the Styles pane and free up some screen real-estate, left-click on the X in the top-right-hand corner. 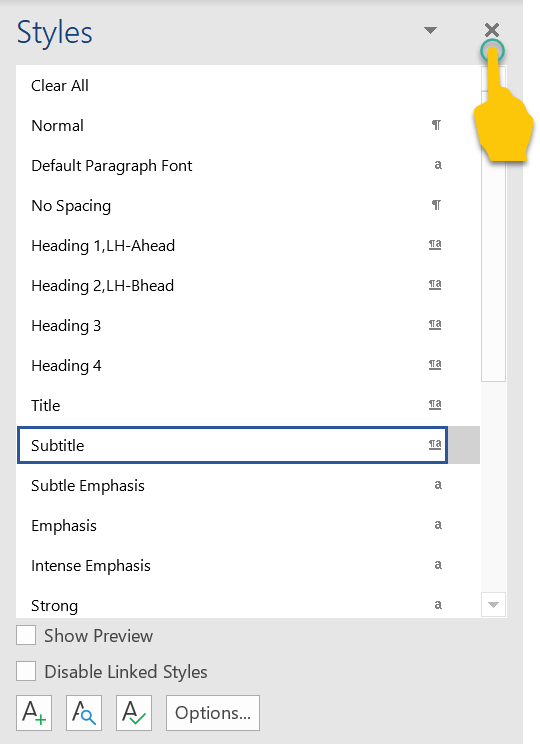
Troubleshooting
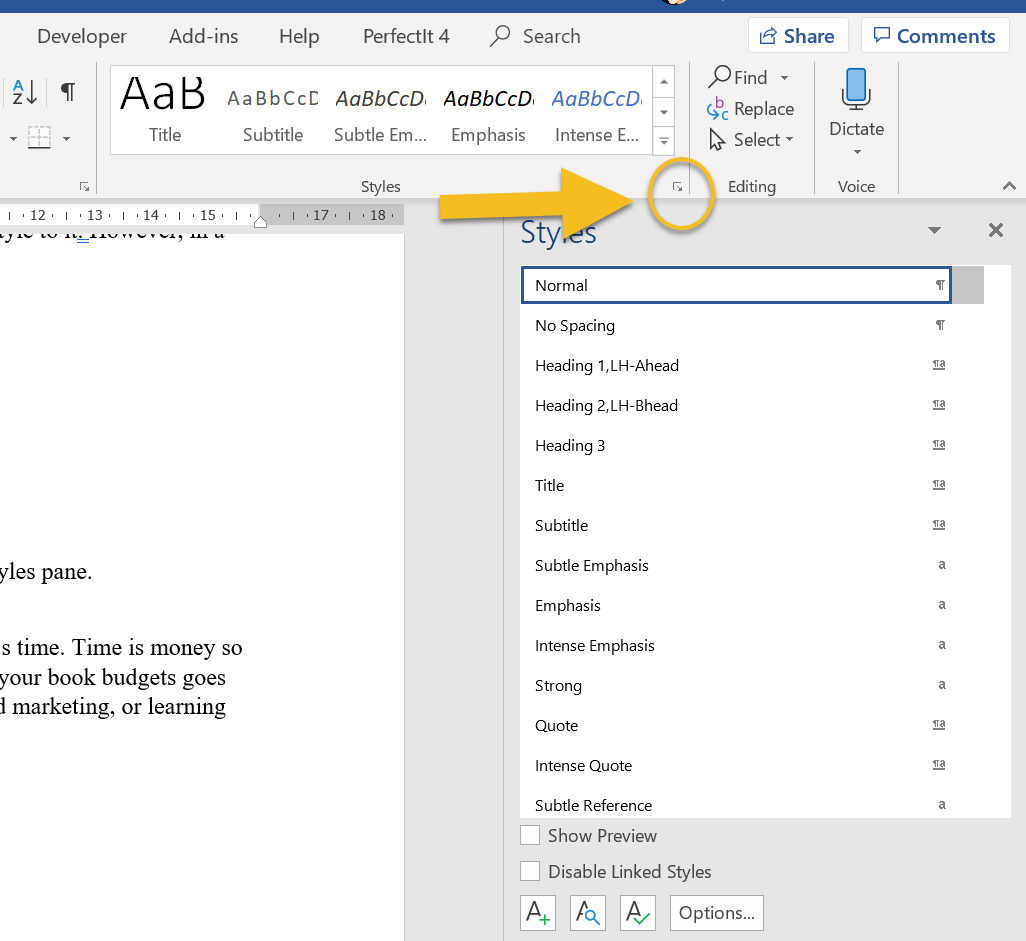
Here’s how to fix some of the more common problems that arise when working with styles. 1. Styles gallery or pane isn’t visible If the Styles gallery isn’t visible, make sure you’re in the HOME tab in the ribbon. 
If the Styles pane isn’t visible, left-click on the small arrow in the Styles gallery.
2. Style not showing in gallery
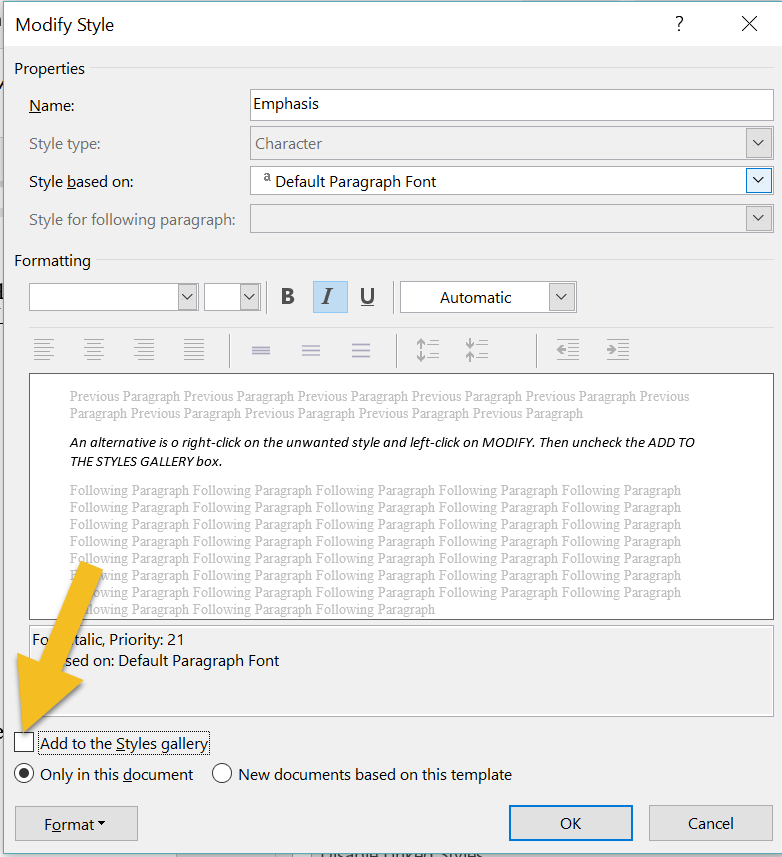
If you’ve created a style and it’s not showing in gallery, head to the Styles pane and right-click on the missing style. This opens the MODIFY pane. Make sure that the ADD TO THE STYLES GALLERY box is checked. 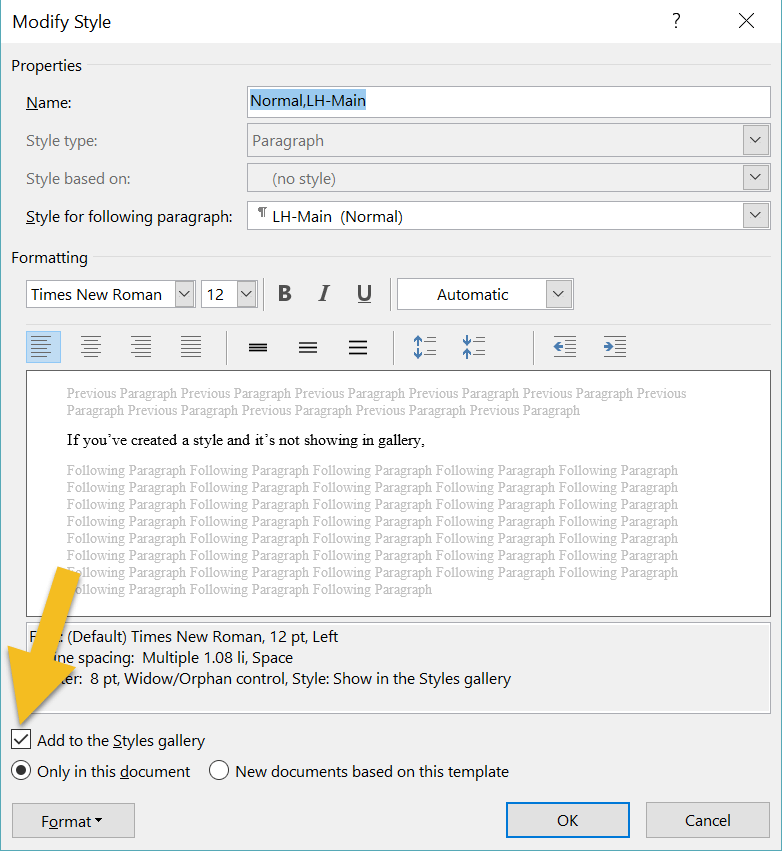
3. The gallery is cluttered with unused styles
If your gallery is busy with styles you don’t need to access, there are two ways to remove them. The quickest method is to right-click on an unwanted style, then left-click on REMOVE FROM STYLE GALLERY. 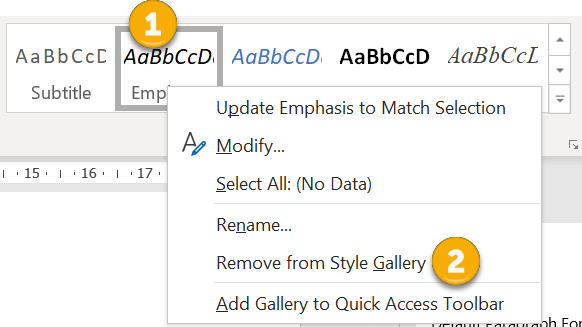
An alternative is to right-click on the unwanted style and left-click on MODIFY. Then uncheck the ADD TO THE STYLES GALLERY box.
4. You’ve renamed a style but Word’s default name is still displayed in the pane
If you’re using the Styles pane to apply styles, the list might appear cluttered if Word’s default names are displaying, even though you've modified them. To fix, left-click on the OPTIONS button. 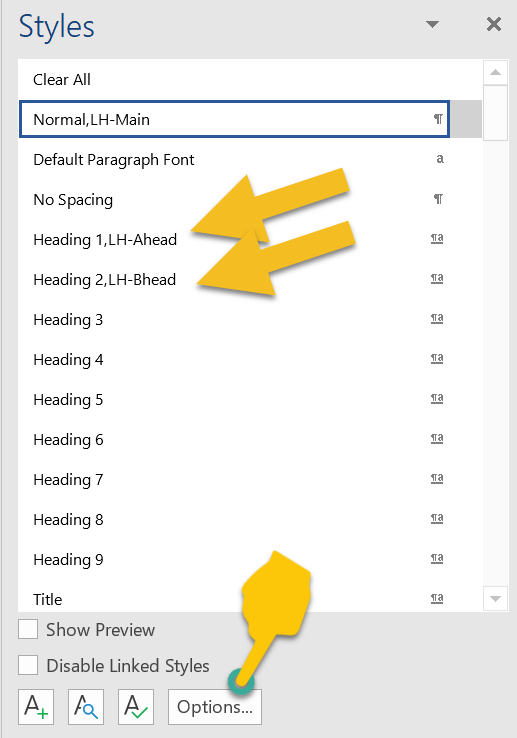
Check the HIDE BUILT-IN NAME WHEN ALTERNATE EXISTS box, then left-click on OK.
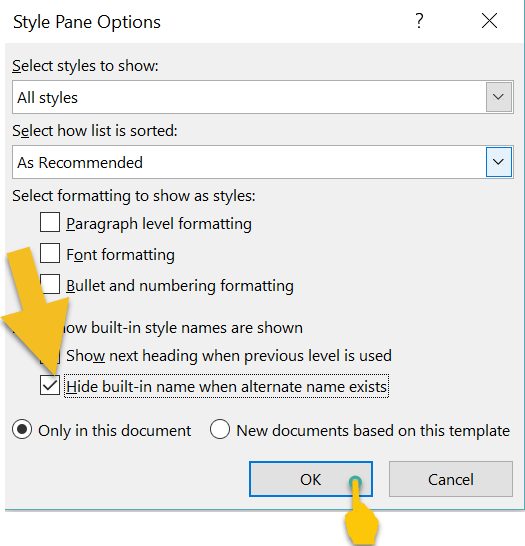
Your list will now display with your modified names.

Heading styles and navigating your Word file
One of the advantages of using the Styles tool for a novel is navigation. To access the Navigation pane, press CTRL F on a PC. Now, left-click on the HEADINGS tab. Any style based on one of the in-built heading styles will show up in the menu. 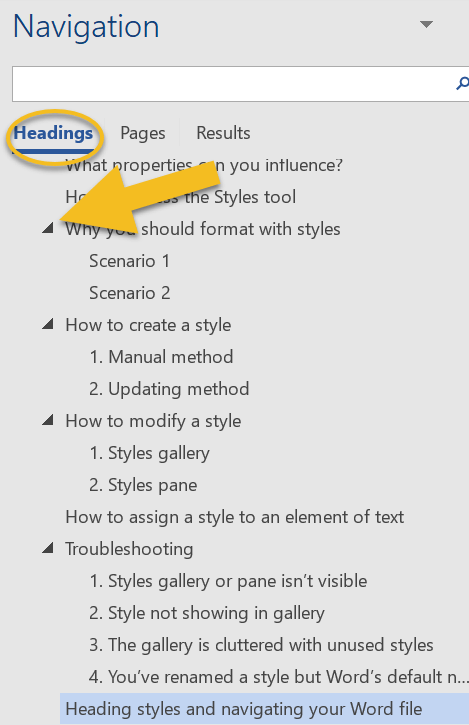
I use this function when I’m editing and want to check that chapter headings (and subheadings) are formatted consistently, assigned the correct level of priority, and numbered chronologically.
Headings with arrows next to them indicate lower-level subheadings. You can expand or collapse subheadings by left-clicking on the arrows. Furthermore, if you want to shift a headed or subheaded section to another position in your document, left-click on the relevant heading and drag up or down the menu. Summing up Styles let you focus on your writing rather than fretting about internal text design. Applying a style to an element of your book file takes a fraction of the time required for manual formatting. And because any style can be tweaked, you get to change your mind as often as you like. If you have any problems with using Word’s Styles gallery and pane, drop me a note in the comments and I’ll do my best to fix the issue. Fancy watching a video tutorial? Visit my YouTube channel and watch: Self-editing Your fiction in Word: How to Use Styles.
Louise Harnby is a line editor, copyeditor and proofreader who specializes in working with crime, mystery, suspense and thriller writers.
She is an Advanced Professional Member of the Chartered Institute of Editing and Proofreading (CIEP), a member of ACES, a Partner Member of The Alliance of Independent Authors (ALLi), and co-hosts The Editing Podcast. Visit her business website at Louise Harnby | Fiction Editor & Proofreader, say hello on Twitter at @LouiseHarnby, connect via Facebook and LinkedIn, and check out her books and courses.
10 Comments
Louise Harnby
25/6/2019 11:04:30 pm
Thanks, Felicia! You always leave such lovely comments and I really appreciate your taking the time. Glad you found this useful! 4/7/2019 07:01:26 pm
Thank you for this detailed information about using the Styles Tool in Word. I hadn't known what it could do. Great post!
Louise Harnby
4/7/2019 09:04:05 pm
Thanks, Janet. Glad you found it useful. The Styles function is such a great tool!
Steve O'Gorman
2/8/2019 02:33:33 pm
I made a tongue in cheek remark on Twitter a few weeks ago about starting half-day workshops for writers, showing them how to alter the default settings in MS Word. I swear the first three hours of most copy-edits are taken up with changing quote marks, hyphens to en rules, removing soft paragraph breaks, etc. (No names, no pack drill.) And removing the second space after a full stop. Don't tell Jacob Rees-Mogg Esq. 30/10/2019 11:25:38 pm
Yup, first job on a 36,000-word non-fiction manuscript was to change nearly 3000 double spaces after a period to single space. Thank god for find and replace.
Helen Hull
24/3/2020 02:50:15 pm
This has been so useful, Louise. Thank you. Is there a way one can modify the font options in Style to create a heading style that has essential caps or initial caps?
Louise Harnby
25/3/2020 10:03:59 am
Hi, Helen. From the ribbon, you can set sentence base but not essential caps, only caps for each word. PerfectIt is a good checker for this kind of inconsistency though. Do you use that? If not, visit the Intelligent Editing website.
Heather
1/6/2023 09:16:20 pm
Useful post, thanks. Leave a Reply. |
PDF MARKUP
AUTHOR RESOURCES
EDITOR RESOURCES
TESTIMONIALSDare Rogers'Louise uses her expertise to hone a story until it's razor sharp, while still allowing the author’s voice to remain dominant.'Jeff Carson'I wholeheartedly recommend her services ... Just don’t hire her when I need her.'J B Turner'Sincere thanks for a beautiful and elegant piece of work. First class.'Ayshe Gemedzhy'What makes her stand out and shine is her ability to immerse herself in your story.'Salt Publishing'A million thanks – your mark-up is perfect, as always.'CATEGORIES
All
ARCHIVES
July 2024
|


 RSS Feed
|
|
|
|

|

|
|
|
|

© 2011–2024 Louise Harnby